The post Accelerate with Snapmaker appeared first on | Blog.
]]>So, what did they make?
Real Car Parts. Model Cars. Automotive Artwork.
Let’s take a look:
Meet the Master
Sponsored Teams
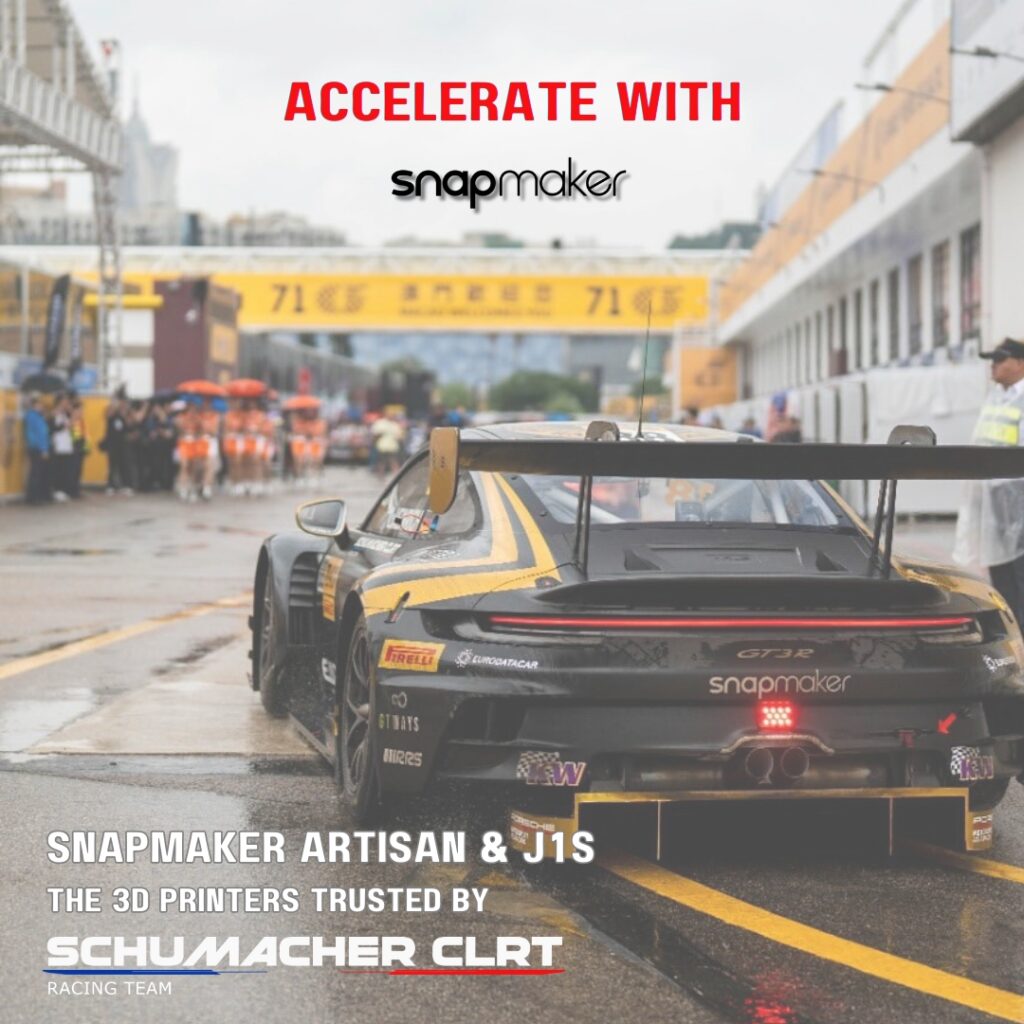
Schumacher CLRT
Snapmaker gifted the team a Snapmaker Artisan Premium, a J1s, and large quantities of TPU, ABS, Nylon, PVA, and other specialized materials to give them everything they need to blaze a trail across Europe, the Middle East, and Asia!
And how’d it go? They took home the Porsche Super Cup and the Carrera Cup France! They also made an appearance at the Macau Grand Prix, where the Snapmaker Team, which gave us the opportunity to meet the team in person. You can watch the video here.
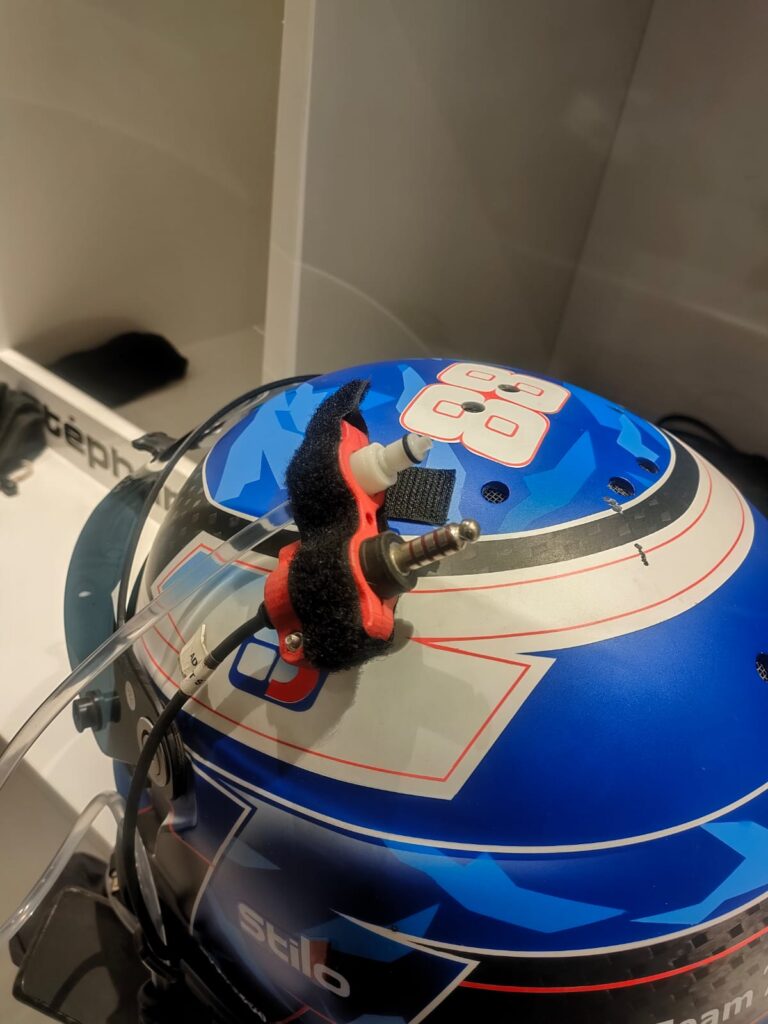
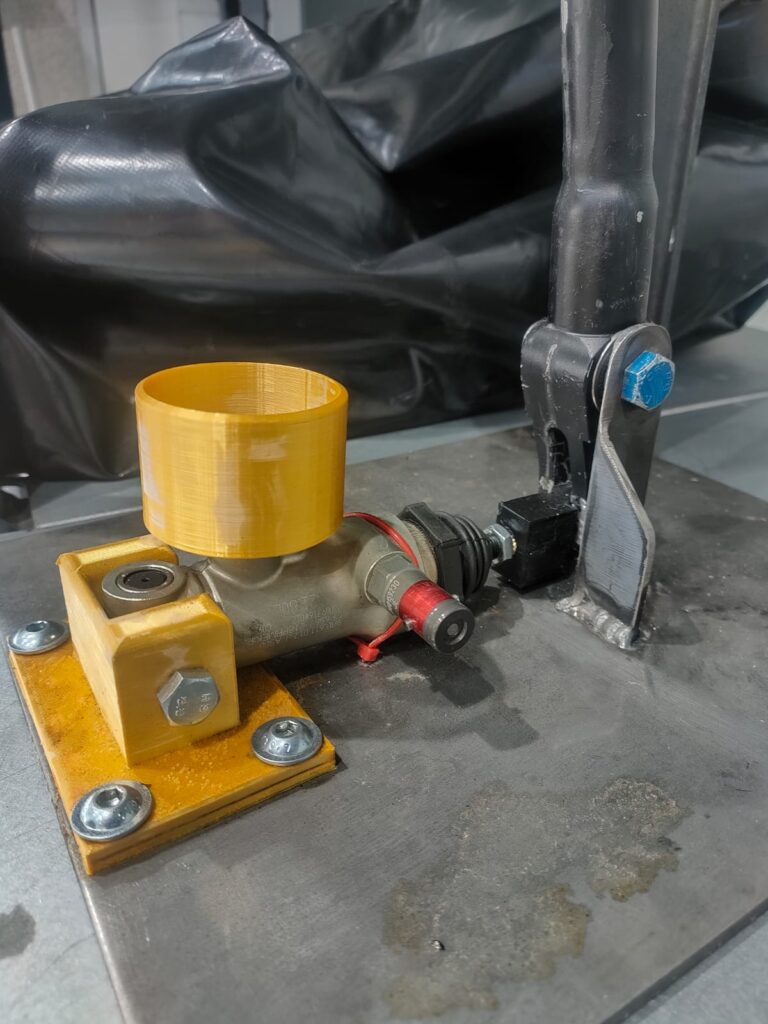
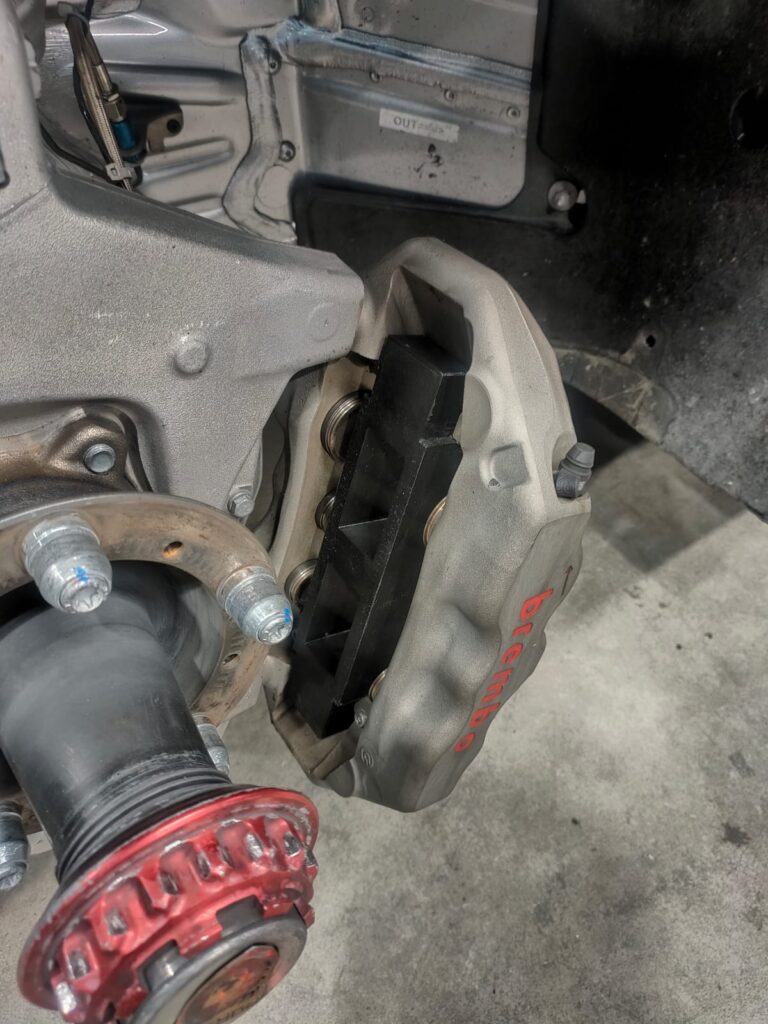
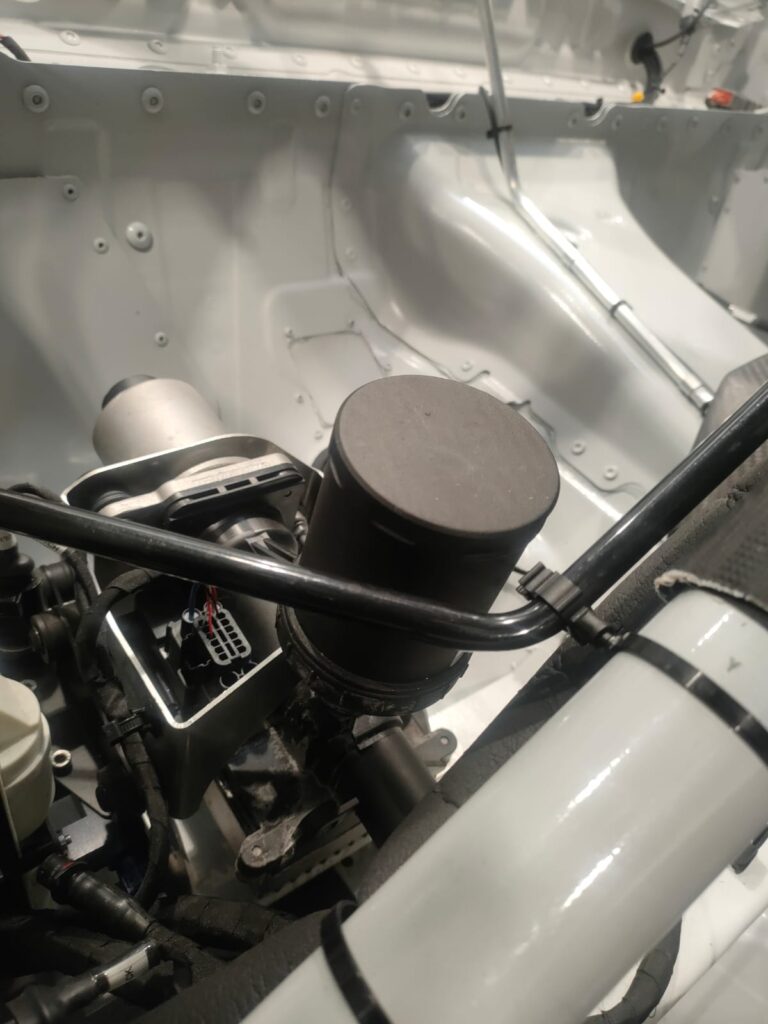
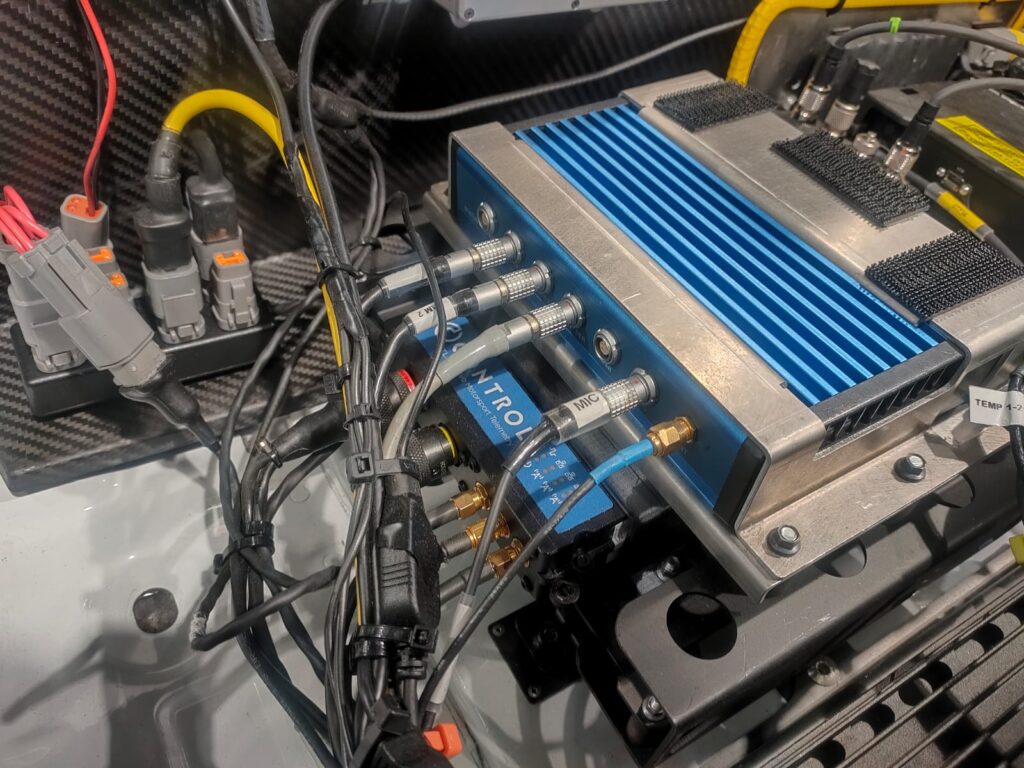
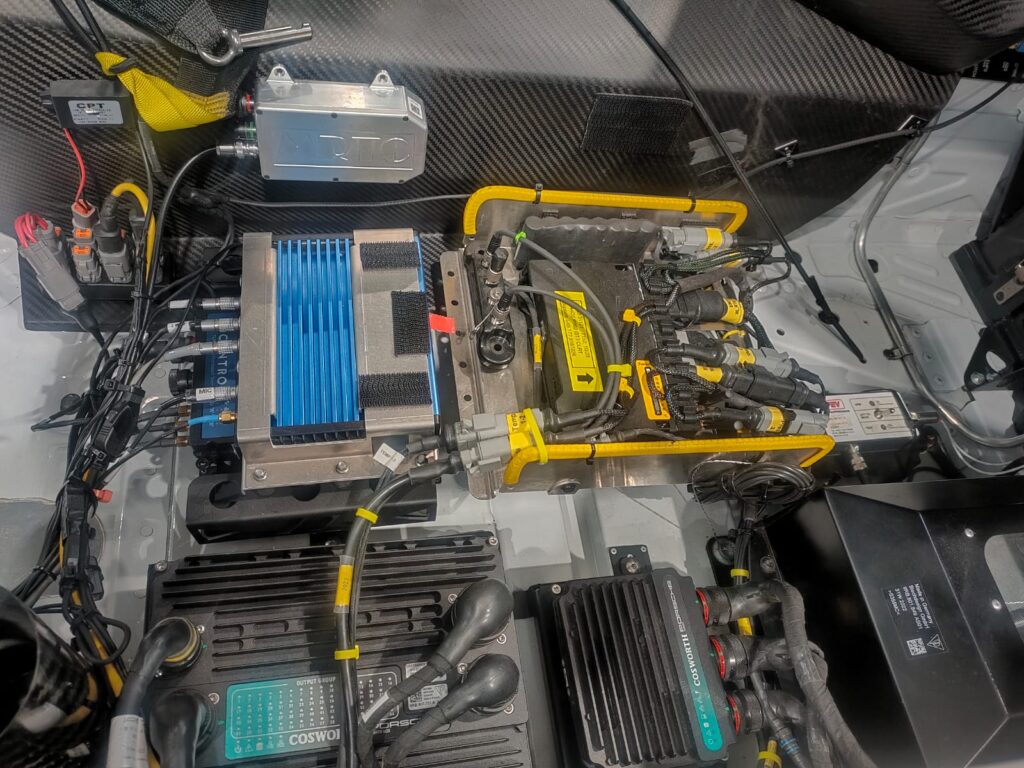
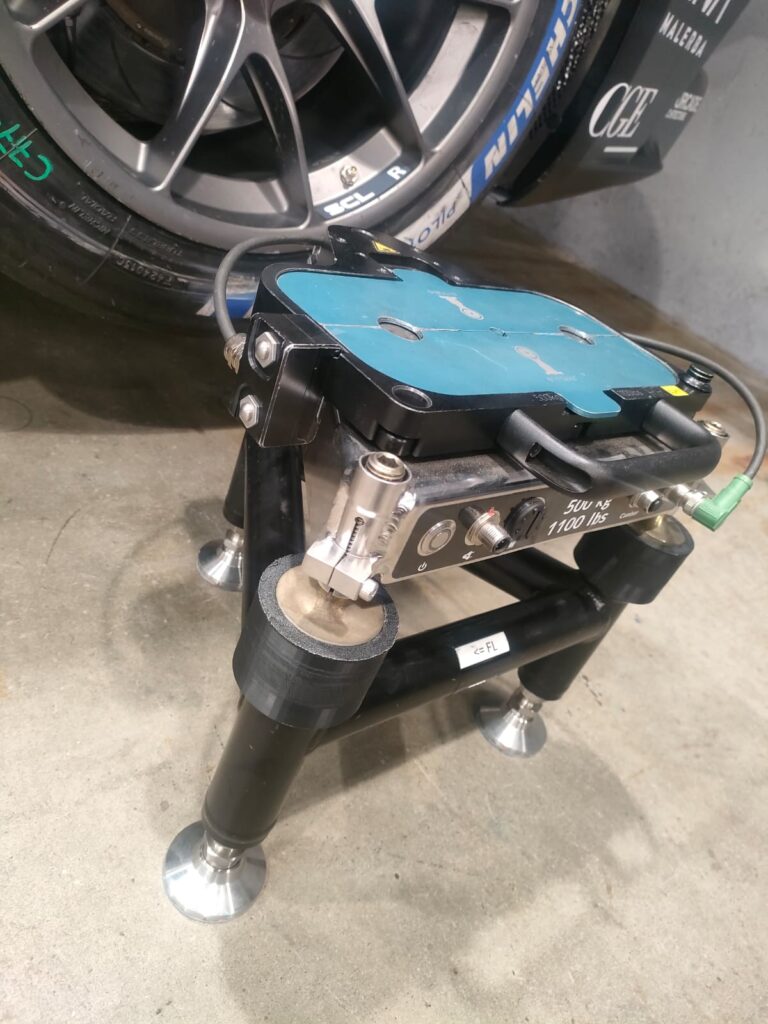
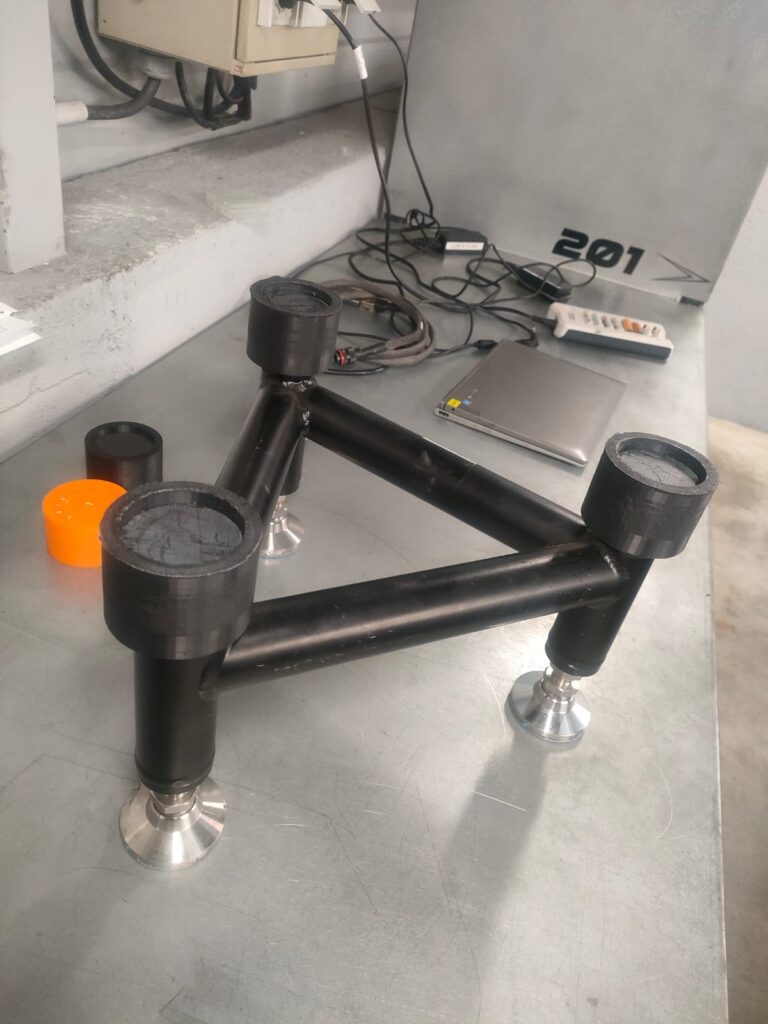
Every single day, Schumacher CLRT uses 3D printed parts on their cars.
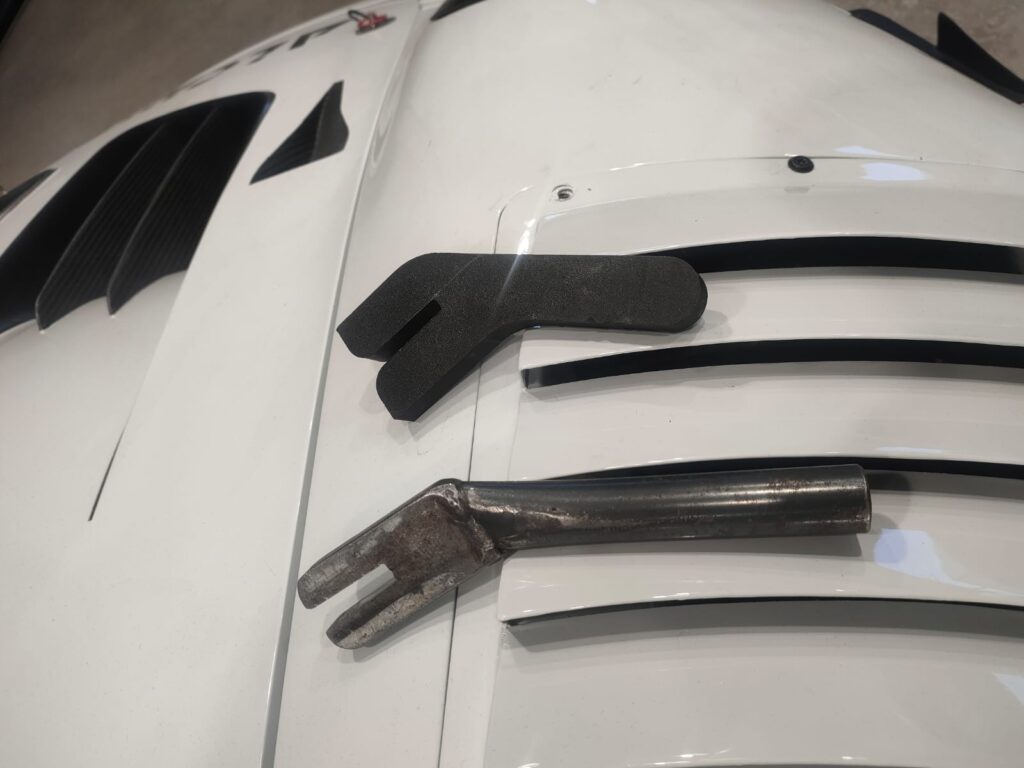
3D printing allows Schumacher CLRT to replace some of their heavier metal tools and parts with lightweight alternatives. It lets them produce intricate and unique parts that simply aren’t available from traditional suppliers. The CNC and Laser functions allow for even more capabilities, like making subtactive adjustments to various pieces and adding customizations across the car.
In the photo set below, you can see a wide range of specialized fasteners, adapters, caps, unique tools, custom mounting solutions, and all manner of precision parts specially designed to make the most out of their Porsche 992 GT3 Cup, 992 GT3R and 991 GT+ Rally Cars.


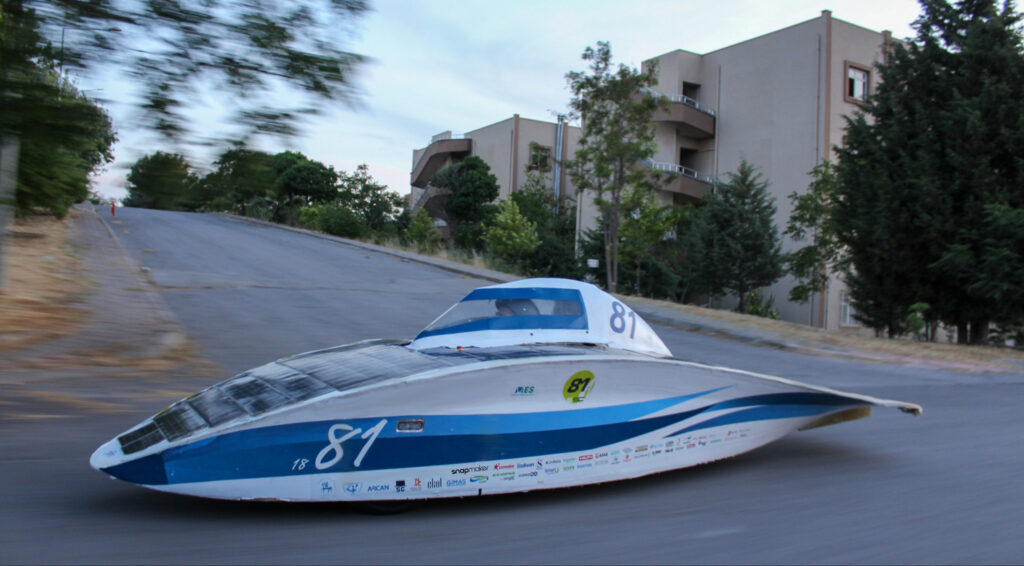
Team Solaris
Team Solaris is a Solar Car Racing team from Dokuz Eylul University in Turkey. Specializing in electronics engineering, the team used the Snapmaker J1s and A250 to build PCB Boards, aerodynamic surfaces, and other specialized parts for their cars. This past fall, they took their S11 Solar Car to South Africa to take part in the Sasol Solar Challenge!
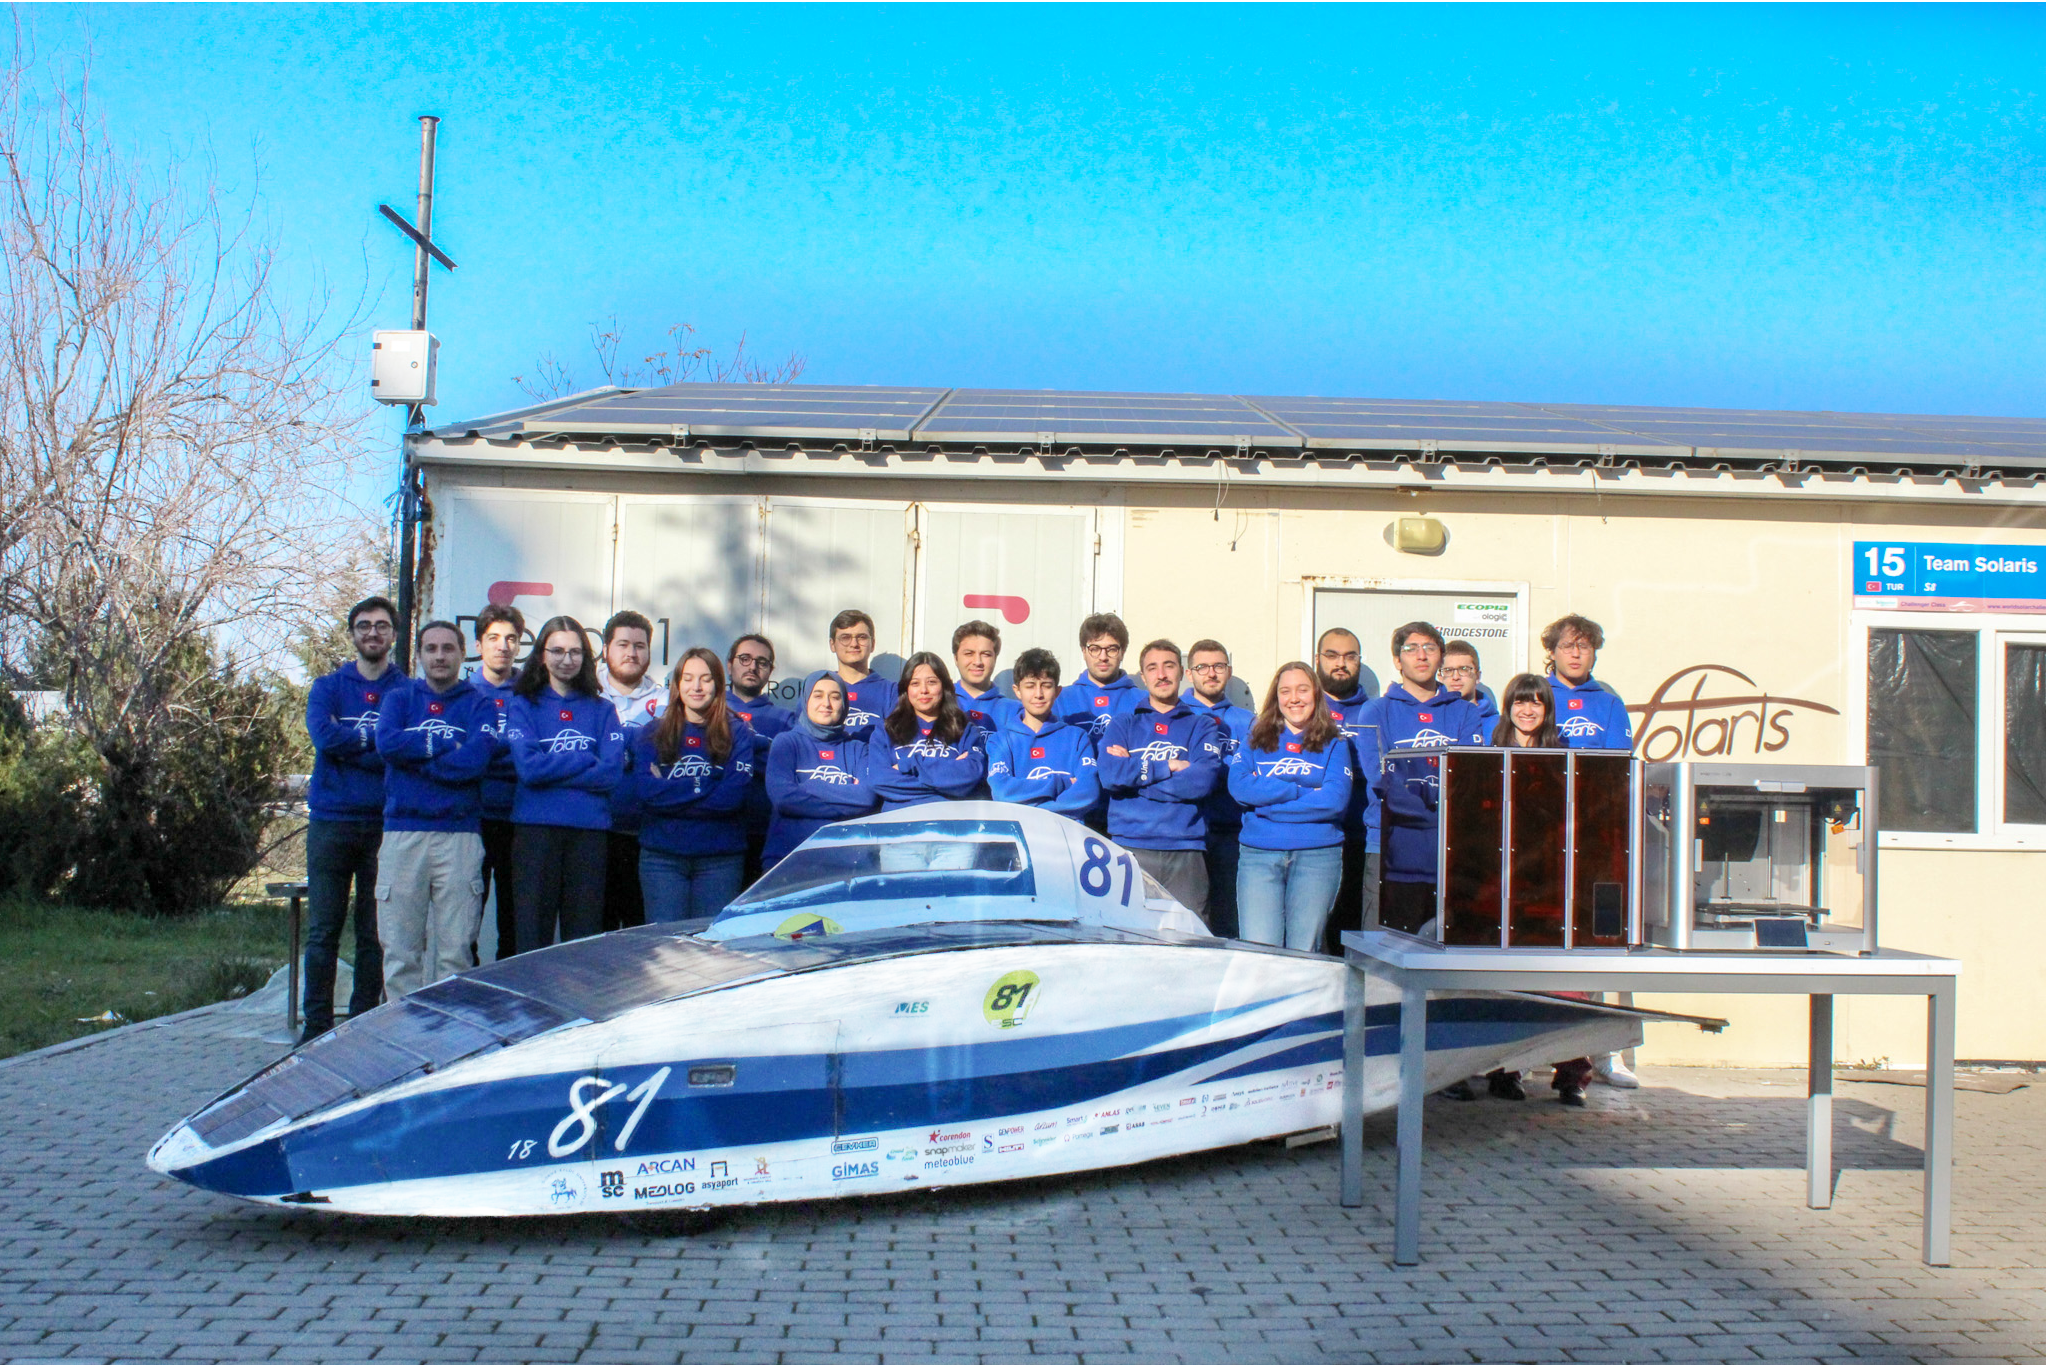
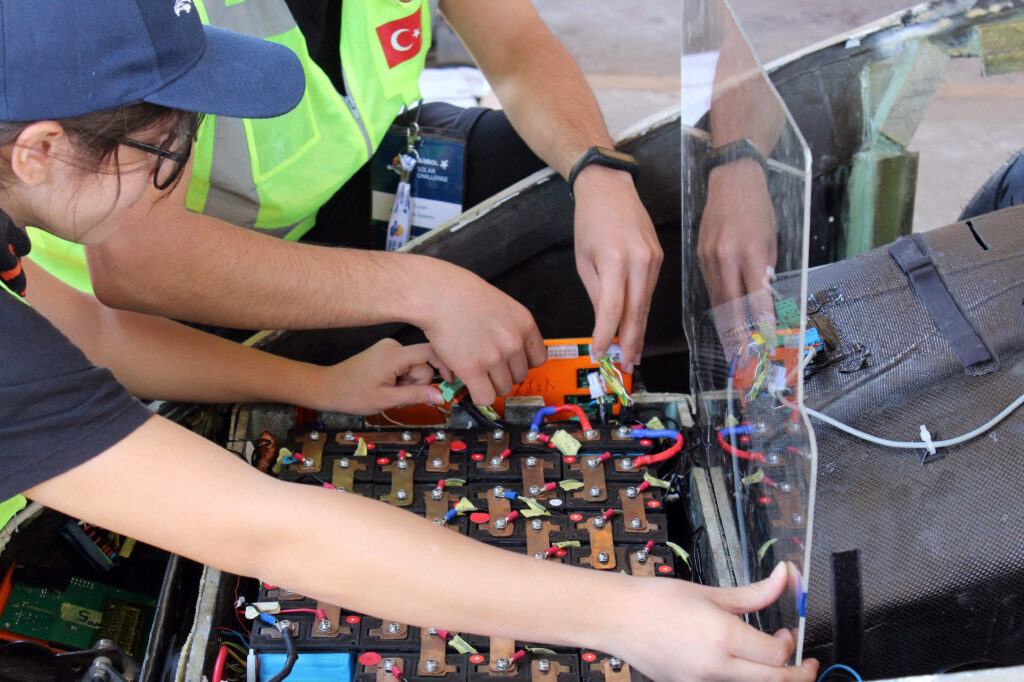

Here we’ll link to Solaris’ Instagram video where they show off how they used the Snapmaker A250 to build custom PCBs. By designing their own electronics hardware, Solaris has maximum control over their cars’ performance, efficiency, and weight.
Here we can see Solaris testing their car in a virtual wind tunnel, which allows them to simulate real world modifications to the car’s body structure. With the new design set up in the digital world, they use their J1s to print the required parts, and then install them!
This is the heart of Maker Culture – thinking, designing, building, and implementing.
And in this video we can see Solaris testing their machines, building models and novelty name plates to celebrate our collaboration!
Everidge Racing
Cassten Everidge took his his heavily modified Chevrolet SS all over the American Midwest in a series of intense stock car races – with the help of the Snapmaker Artisan Premium.
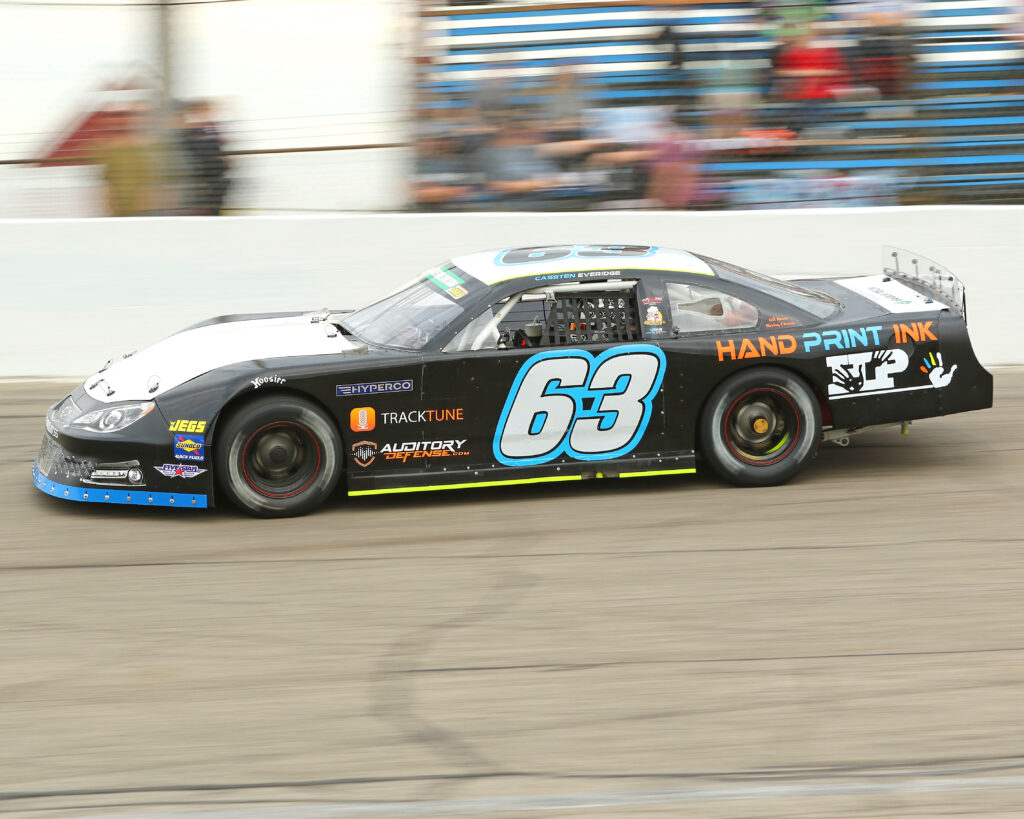

In this video, we can see him using the machine in some of his off-season projects:
Check out more from Cassten on his website, including this story from the Winchester Speedway!
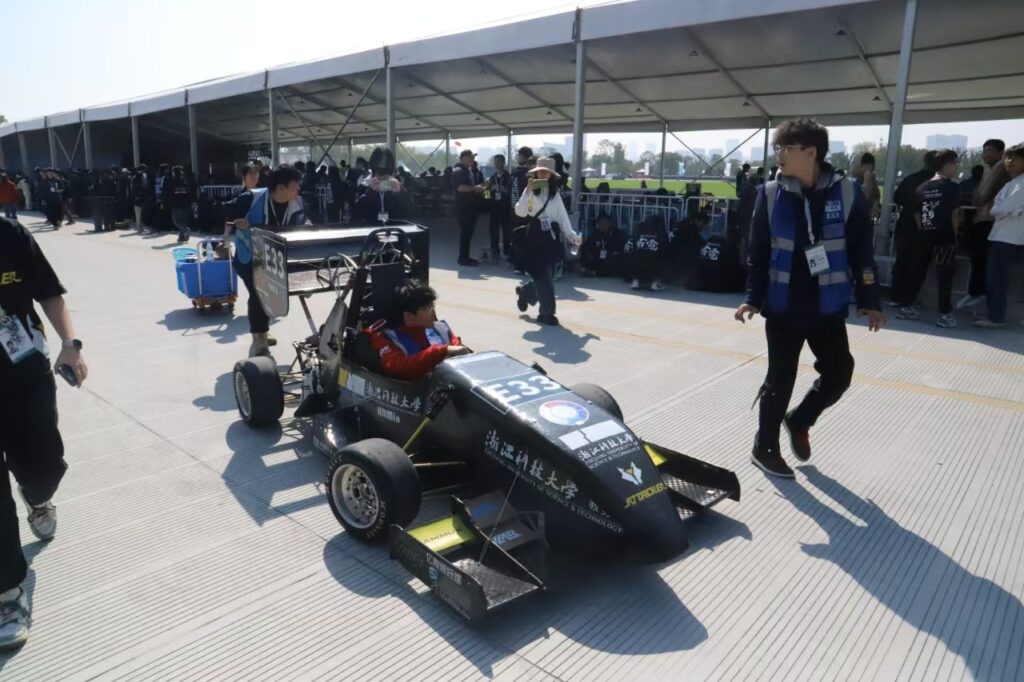
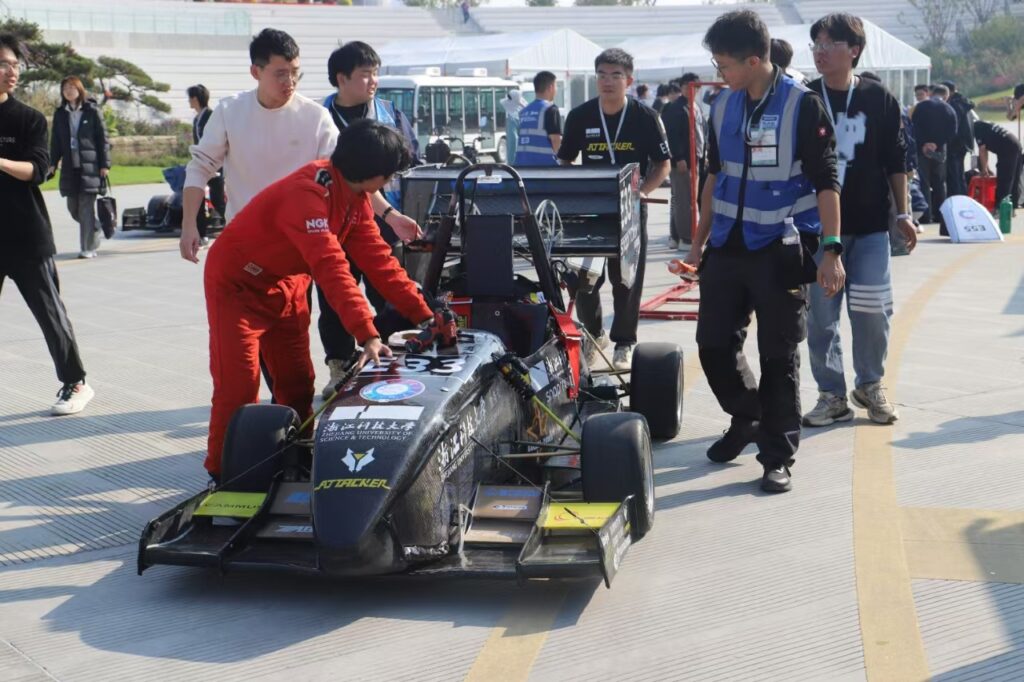
ATTACKER!
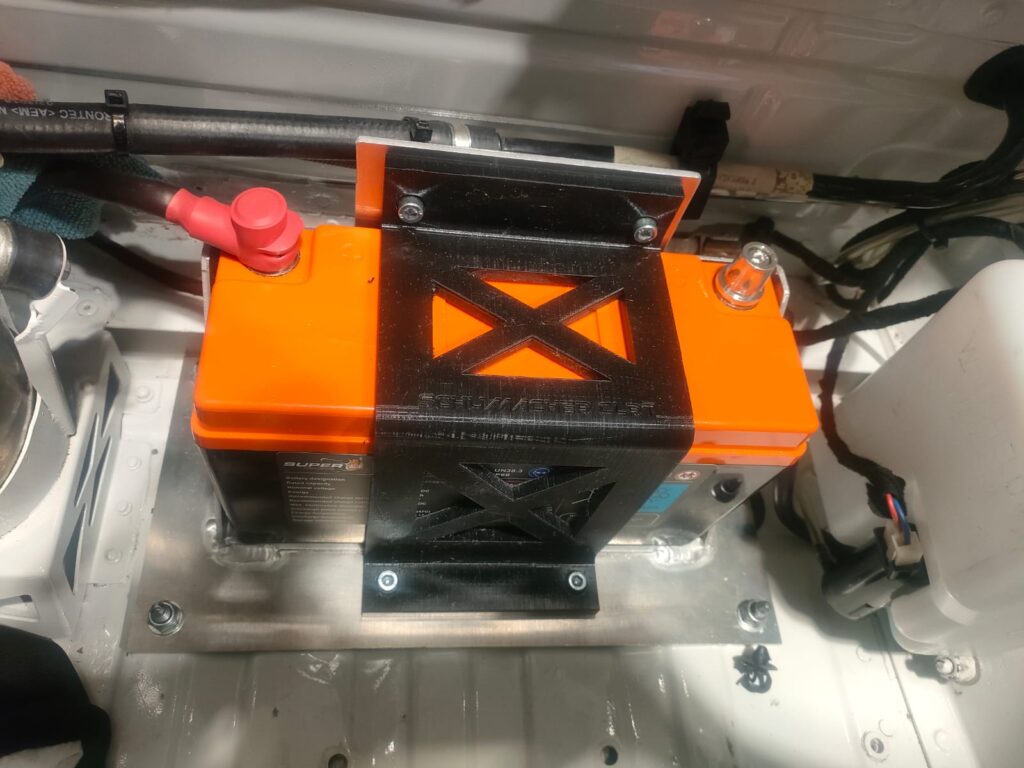
ATTACKER! is an EV racing team from Zhejiang University of Science and Technology, making full use of the Snapmaker Artisan Premium’s 3-in-1 capabilities to build custom parts for their racer. This past October, they took their racer to the NIO Cup in Hefei, China.

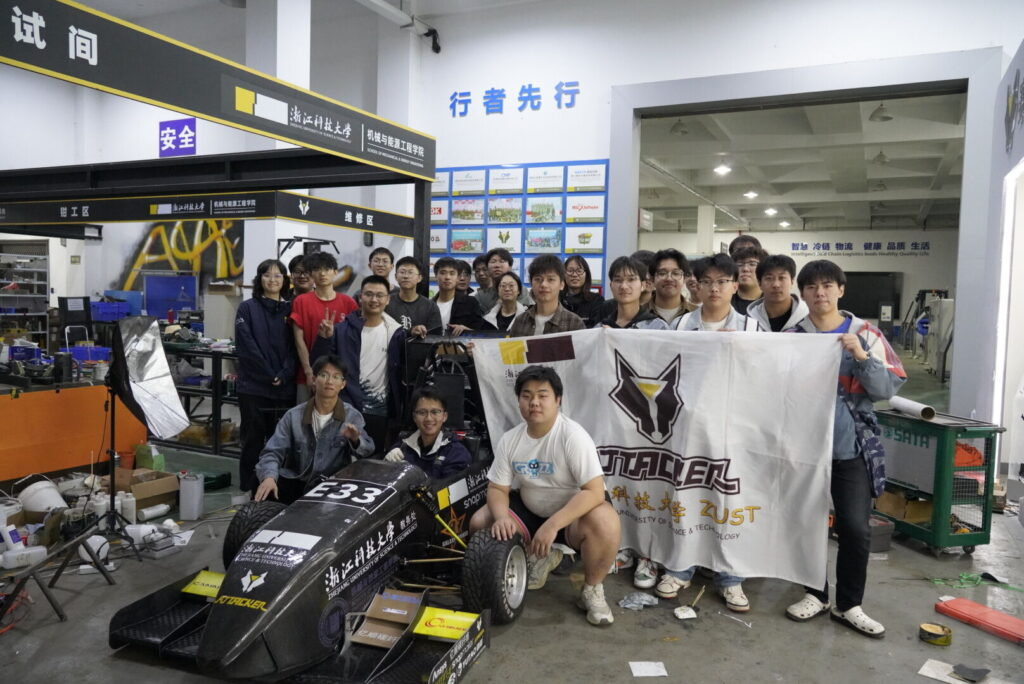
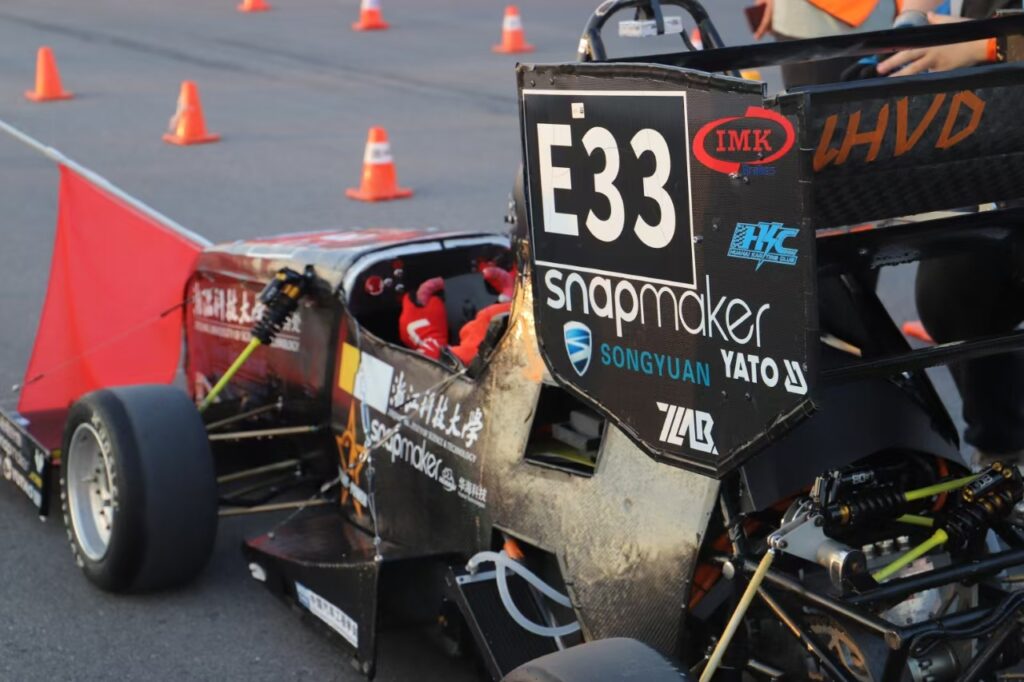
ATTACKER! used the CNC function to build special mounting brackets for the battery cooling system – while you can special order these custom parts for delivery, it was a lot faster to simply cut them out of aluminum on-site. 3D Printing was used extensively for molds for the car’s air ducts, battery box cover, and other assorted pieces. Finally, Snapmaker’s laser was perfect for building custom PCBs.
Let’s see the car in action here:
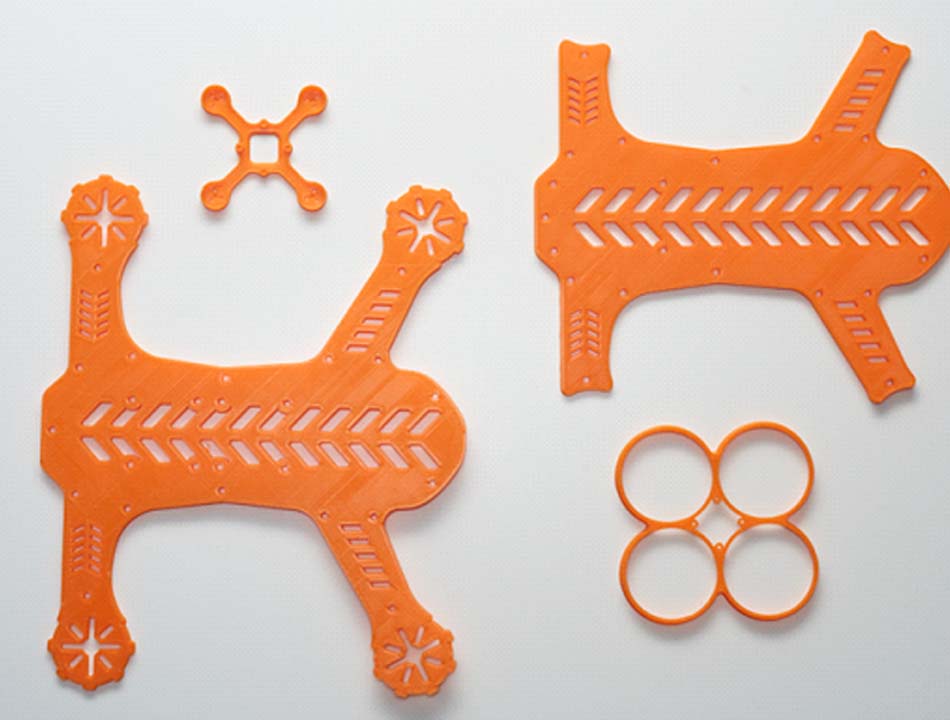
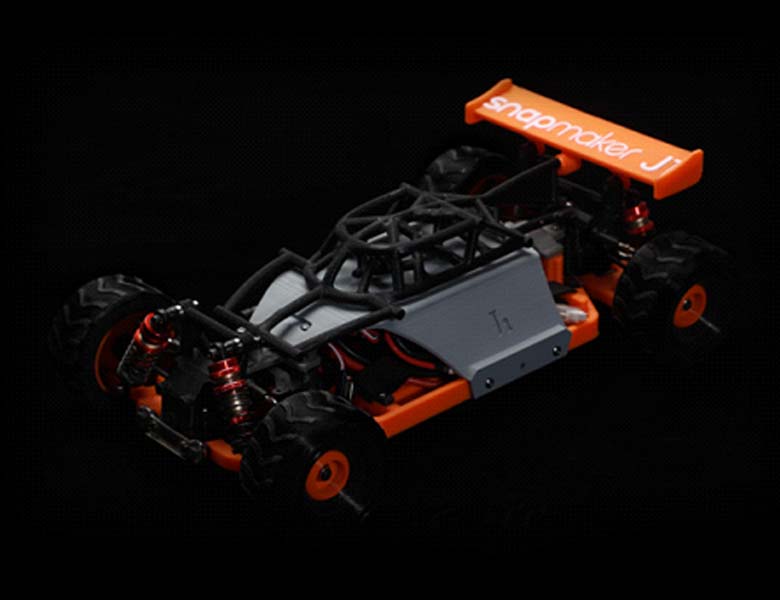
RC Cars
Snapmaker is a top choice for RC Hobby enthusiasts, including our friends Hemistorm RC, RCSparks, Soarpix3D, and more!
For Accelerate with Snapmaker, we partenered with Mr. Goodcat to produce this video on the Koenigsegg Jesko:
You can find the Car Body here: https://cults3d.com/en/3d-model/various/porsche-911-992-gt3-rc-car
And the RC Car Chassis here: https://www.thingiverse.com/thing:4892947
Also, we highly recommend watching Mr. Goodcat’s How To Video that he put together for another project on a Porsche 911:
And for an example of some of the amazing (non-RC) Model Cars our friends have built with Snapmaker, check out Duke Doks’ Back to the Future Delorean:
Hot Pursuit!
As part of Accelerate with Snapmaker, we launched a video contest, challenging Snapmakers to build real car parts, automotive artwork, and model cars – with a prize of $911!
You can check out all entries through the playlist here (the embedded video shows only the first entry but Watch on YouTube and you can see the whole list):
Or jump straight into the winner’s circle:
 Auto Art Award: @ Whiskyclubcanada
Model Car Winner: @ BerndMichalak
Real Car Part Winner: @ Alin_3196
Stay Tuned for Accelerate with Snapmaker 2025!
Sincerely,
The Snapmaker Pit Crew
The post Accelerate with Snapmaker appeared first on | Blog.
]]>The post How to 3D Print Multiple Colors: 3 Main Methods appeared first on | Blog.
]]>Whether it’s fashion, furniture, architecture models, automotive spare parts, medical implants, or just to channel your creativity, 3D printed models are the best way to make your ideas come alive.
Want to learn more about 3D printing? Keep reading to find out!
Why Print in Multiple Colors?
Multiple-color 3D printing is a sustainable process that leaves minimal waste while allowing you to make detailed products quickly. The fact that it has become cheaper than before, allowing manufacturers to make higher quality products with relative ease, has made 3D printers more accessible to private organizations and businesses.
Suppose you are manufacturing prototypes for your product, whether architecture or consumer-centric. In that case, it gives them a more authentic feel and allows investors to see the potential in your business. Besides that, you have more control over the end product, where you can add details or remove features on the soft form of your design in the CAD software before transferring it to CAM software.
Multiple-color 3D printing can change the game for you once you get the hang of it. Since you can do 3D printing in multiple ways, you can choose whichever is most convenient for you and make the most of your products.
Method 1: Printing Single-Color Components and Assembling Them
One of the ways you can 3D print in multiple colors is by using a single color extruder to create the components of the same color, by separating STL files and arranging the components afterward to assemble your end product.
To join the different components, you can use super glue, hot guns, epoxy, or any other bonding material to fasten the pieces together.
It’s quite a straightforward and budget-friendly option for 3D printing in multiple colors, but it is more time-consuming since you’ll need to take the time to assemble your products.
Method 2: Using Dual Extruder 3D Printers
Snapmaker J1S is an excellent choice for dual extruders for multiple-color 3D printing, thanks to its IDEX technology that allows the dual extruders to print simultaneously and independently.
Snapmaker Artisan takes it one step further, integrating 3D printing, CNC, and laser cutting all in one machine, allowing you to make the most of your 3D printer.
After designing your model, assign each part to different extruders, configure the settings according to the filament, and use the slicer to generate the G-code, allowing the extruders to switch at appropriate times.
Although this may be a bit more costly than the assembling method, it yields better results while making the process more efficient.
Related reading: What is a Dual Extruder 3D Printer? The Possibilities and Limitations
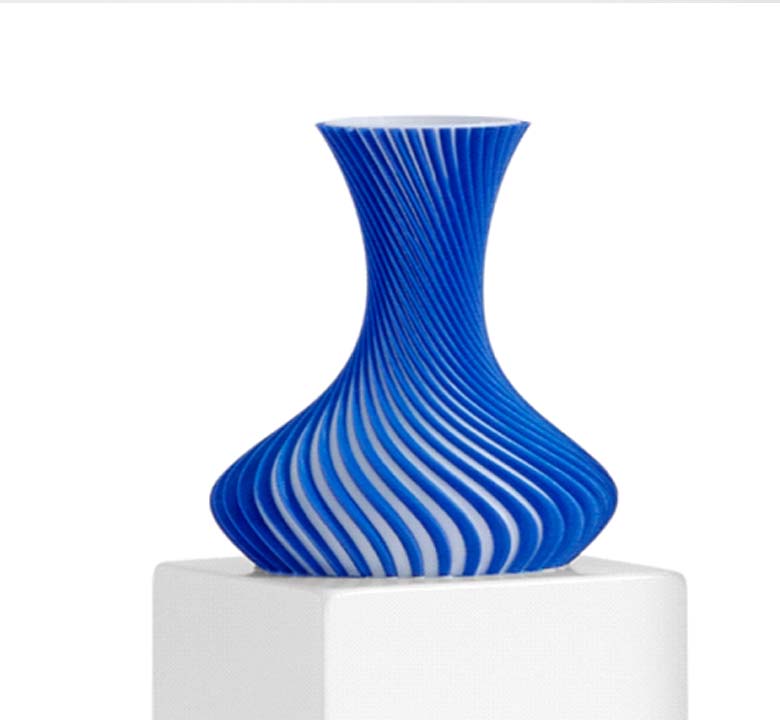
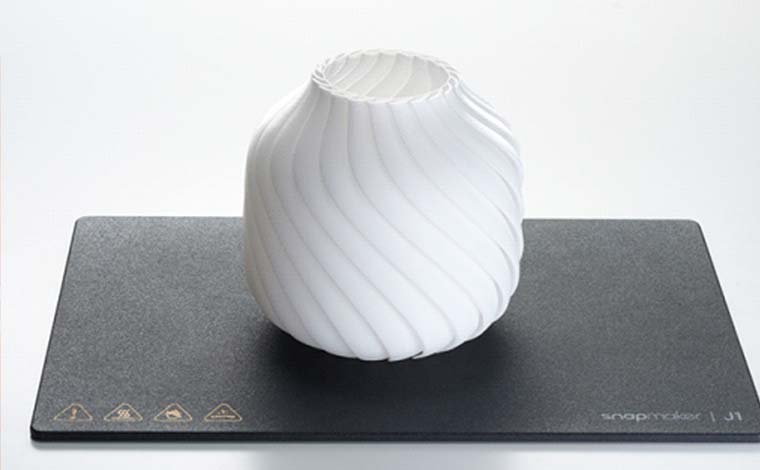
Method 3: Using Multicolor Filaments
Multicolor filaments are an efficient way to achieve multicolor 3D printing, but their precision depends on the specific printing method and filament type. Single-nozzle printers using multicolor filaments can streamline the process, but the color transitions may appear blurred or imprecise. On the other hand, multi-nozzle printers offer greater control over color placement, making them ideal for designs that require high precision.

Multicolor filaments are particularly suitable for creating creative effects like gradients, rainbows, or glow-in-the-dark designs. However, these effects require careful planning and advanced slicer settings to ensure the final product meets expectations. Designers should be prepared to experiment to achieve the best results.
Factors to Consider Before Printing Multiple Colors
Multicolor 3D printing is a step up from sculpting models in one color, but there are a few factors you need to consider beforehand.
Is Your Printer Ready for Multicolor 3D Printing?
Whether or not you are ready for 3D multicolor 3D printing depends on your printer. Some printers are more suited to multicolor 3D printing than others, depending on the type of product you are creating as well as the technique you are accustomed to.
Using a 3D printer with a single extruder and assembling them afterward might be easier for some people than using a multicolor filament or double extruder that combines colors and printers in one print.
You also need to ensure your CAD and CAM software are up to date to ensure the precise development of your product.
Materials for Multicolor 3D Prints
You also need to pay attention to the materials you will use for 3D printing. PLA is a good option, along with ABS or PETG, which are more durable but require more experienced designers and advanced settings.
The type of product you create will also determine the materials you need to use, so make sure you plan it out carefully.
Calibrating Your 3D Printer for Multicolor Success
3D printing in multicolor requires precision, especially in dual extruder printers, which start with proper calibration. This means ensuring the extruder’s accurate setting concerning the filament’s amount and temperature. X, Y, and Z axes must also be measured to ensure the printer is assembled correctly. At the same time, routine maintenance of the extruders allows them to do their job correctly, which prevents unnecessary bleeding of nozzles or irregular smudges.
Considering all these factors will save you time and losses that come with 3D printing, resulting in professional-looking products that will surely make investors and customers swoon.
Bring Your 3D Creations to Life with Colorful Innovation.
Multiple-color 3D printing is a sure way to upgrade your products and channel your creativity by bringing your ideas to life.
It doesn’t matter what printing method you choose. Whether printing with a single extruder and assembling afterward, using a double extruder to switch between two colors, or using a multicolor filament printer to print simultaneously, each one will be a worthy companion in your creating process.
If you want to take your products to the next step, Snapmaker 3D printers will make a great choice, producing great results in less time.
So, ready to create vibrant 3D prints? Start with these techniques and bring your ideas to life!
FAQs About Multi-Color 3D Printing
Yes, it is possible to print multiple colors with a single extruder by manually swapping filaments at specific points during the print or using multi-color filaments. This method requires careful planning in your slicing software and may involve pausing the print to change colors.
Dual extruder printers, like the Snapmaker J1S or Snapmaker Artisan combain with Dual Extrusion 3D Printing Module, are among the best options for multi-color 3D printing. These printers allow seamless transitions between colors and are highly versatile for multi-material prints.
Yes, multi-color filaments can be used with both single and dual extruder printers. However, in dual extruder setups, you gain more control by assigning specific filaments to each extruder, allowing for more complex designs.
Ensure proper printer calibration, especially for dual extruder models to prevent color bleeding. Regularly clean the nozzles and use high-quality filaments to minimize blending or smudging during the print.
Slicing software like Cura, PrusaSlicer, or Simplify3D is essential for preparing multi-color prints. These programs allow you to assign colors to different sections or layers and preview the final output before printing.
Multi-color printing can be slightly more expensive due to the need for additional filaments or dual extruder setups. However, the added cost is often worth it for the improved aesthetic and functional results.
Many modern 3D printers with dual extruders or filament sensor systems can switch colors automatically during printing. However, single extruder printers require manual intervention to change colors mid-print.
The post How to 3D Print Multiple Colors: 3 Main Methods appeared first on | Blog.
]]>The post Snapmaker 7th Anniversary Column | Letter from Henry Martinez appeared first on | Blog.
]]>Snapmaker met many of our users because of Kickstarter. And Henry is exactly one of our backers, who supported J1 in 2021 because of its build quality and innovative calibration method.

When did you become a Snapmaker user?
I morphed from a Jadelabo user to a Snapmaker User on the day Snapmaker acquired Jadelabo, then officially on the joyous day of my J1’s arrival.
Why did you choose Snapmaker?
Having previously been the VP of R&D for a capital equipment manufacturing company: I was looking for the IDEX printer that had both a solid mechanical foundation (the castings) and an innovative enablement of software for automated calibration. The J1 met those specifications along with a very clean and current design style.
What is the most memorable project you have ever done with Snapmaker 3D printer?
There are two that stand out for me: one was a collaborative effort among several members of the J1 owners’ Facebook group to beta test an internal spool holder retrofit. The testing really made for a better design that worked on a multitude of slicers and materials – as a result, I see many many users who are enjoying the design.


Snapmaker J1 HEPA/Charcoal filter retrofit by Henry (Check out the model: https://www.printables.com/model/446939-snapmaker-j1-hepacharcoal-filter-retrofit?fbclid=IwAR3LA7XyrwryaWJb26ngBRvLu6DH-diTAYbqwPJlb_ol9CsHcLD7J3rT5xk)
The other is a project done for my grandchildren in which they learned how to use TinkerCad and also came away feeling equally enabled to “make” things with the colored filaments as they do with colored crayons.

3D-printed and hand-painted “Hello Kitty” pencil holders for Henry’s grandchild’s school birthday party
Since becoming a Snapmaker user, what have you gained in your maker journey?
IDEX type printing not only has improved my manufacturing bandwidth but has also enabled more complex designs using support materials or multi-color designs as well. What is great is that Snapmaker has continued to keep pace with my needs with software that is continually improved with new features, such as the new “painting” feature in Luban.
From your perspective, what progress has Snapmaker made over these years?
I don’t have any experience with Snapmaker before the J1, so I can only speak of what I’ve seen since the merge with Jadelabo. I see an agile, innovative company that has discovered it can use a platform, such as Kickstarter, to fund leapfrog product development programs. They know that a product is never done and working to improve issues that are being reported within the community of users.
What do you want to say to Snapmaker team?
I want to say thank you for all your efforts to date. Thank you for keeping the promises made. I would remind the product developers that no product is perfect (there have been similar issues discussed by a minority of users )so aftermarket support is very important to establish credibility and continue to attract new users. Listen closely to your most demanding users – they will help drive your next innovations. Some of us use these machines in an R&D and light manufacturing operation (as I do) and have high uptime requirements. By the way – my machine has paid for itself many times over and continues to be a trusted workhorse. I’m grateful to have been able to support the J1 user community with a balanced view of the printer’s capabilities (for me, it has been a very positive experience) and share a couple of retrofit designs that provide features that have been in demand.
The post Snapmaker 7th Anniversary Column | Letter from Henry Martinez appeared first on | Blog.
]]>The post Snapmaker 7th Anniversary Column | Letter from Dylan appeared first on | Blog.
]]>Hi Makers,
Today’s talk was with Dylan, who is a user of Snapmaker 2.0 and Snapmaker J1. Dylan is a typical software engineer and maker. Besides being a fast learner, he is also a doer who seeks solutions right away when he runs into hiccups.

Now, let’s meet Dylan!
When did you become a Snapmaker User?
In 2020, amidst the supply disruptions caused by COVID, I took it upon myself to create some small tools to assist my family and friends. These tools included a mask helper and a storage rack for disinfectants, which I placed outside my door. While I had previously dabbled with resin 3D printing, I quickly realized that these tools were not suited for production using that technology. As a result, I made the decision to purchase my very first FDM 3D printer.
Why did you choose Snapmaker?
Purely by chance, I stumbled upon the Snapmaker 2.0 series while browsing through Google. Upon learning that device offered three-in-one functionality – 3D printing, laser engraving, and CNC – I began exploring the possibility of using it to create a storage rack that required CNC technology. Despite the relative scarcity of information available at the time, I scoured YouTube for operation videos. And sure enough, I found exactly what I was looking for – Snapmaker 2.0 is the perfect tool for my project.

What is the most memorable project you have done with Snapmaker?
I created a unique and personalized celebration gift for my friend’s promotion, which stood out amongst all the other gifts that day. Using FDM printing technology, I crafted a 15cm diameter Golden Coin with a face value of One Billion Yuan. To complement it, I utilized CNC cutting to make a stunning display box out of transparent acrylic. As a final touch, I employed laser engraving on an aluminum alloy to inscribe the words “Vincent has a small goal” onto the base. This project allowed me to explore and experiment with new laser and CNC functions, ultimately helping me to gain new insights and grow my skill set.

Since becoming a Snapmaker user, what have you gained in your maker journey?
As previously mentioned, I consider myself incredibly fortunate to have selected the Snapmaker 2.0 printer. The combination of its three-in-one functionality is truly remarkable, and I have struggled to find comparable devices on the market. Prior to my purchase, I had been working exclusively in software development and had no prior experience with laser engraving or CNC technology. As such, I was initially apprehensive about mastering these industrial-grade technologies. However, this device proved to be incredibly user-friendly, and while I have yet to use it in my professional endeavors, it has allowed me to successfully tackle a multitude of challenging tasks in my personal DIY projects.

From your perspective, what progress has Snapmaker made over these years?
As a long-term user of both the Snapmaker 2.0 3-in-1 and J1 IDEX 3D printers, I have been impressed by the company’s unwavering commitment to innovation and improvement over the past several years. Despite consistently releasing new devices to meet evolving market demands, Snapmaker has also gone above and beyond to provide upgrades and improvements to its old models, ensuring that they remain up-to-date with the latest technology. Introducing features such as quiet printing, high-power laser, dual nozzles, and vibration compensation technology is a testament to the company’s dedication to excellence. As a software developer myself, I can appreciate the immense challenges that come with implementing such cutting-edge advancements.

What do you want to say to the Snapmaker team?
I would like to express my gratitude to the Snapmaker team for their unwavering commitment to innovation and continuous improvement. I sincerely hope that they will continue to work tirelessly and develop more innovative products, thereby enabling an even greater number of people to experience the joy of technology.
At last, we would like to thank Dylan and his contribution to the community. Here are some of his contributions that have benefited lots of our users:
- Upload tool: https://github.com/macdylan/sm2uploader
- Post processor for other slicers: https://github.com/macdylan/Snapmaker2Slic3rPostProcessor
- Plugin for Cura (Public Archive): https://github.com/macdylan/Snapmaker2Plugin
- His designs: https://printables.com/@Dylan
Learn more about the 7th Anniversary Sale.
The post Snapmaker 7th Anniversary Column | Letter from Dylan appeared first on | Blog.
]]>The post Snapmaker J1 Controller Firmware Open Source Release appeared first on | Blog.
]]>We are pleased to announce that Snapmaker J1 controller firmware is now open source!
After nearly half a year of hard work, we have identified and fixed some known nasty bugs and J1 controller firmware is basically stable now. And we will continue to optimize its firmware and develop more features to improve print quality, ease your use, and help you create beautiful prints. To give back to the open source community, involve more people to solve problems, and eventually make J1 an even better 3D printer together, we decided to share the source code of the J1 controller. We can’t wait to see talented users from the community contributing to this project. As you might know, the firmware development of J1 is based on Marlin. Here, we sincerely thank all the contributors to Marlin.
Based on Marlin, we have made not a few changes, including but not limited to:
- First, Vibration Compensation. On an MCU platform with insufficient memory and limited performance, we implemented input shaping and precise sending of step pulses that are seen in Klipper firmware, and it supports up to eight input shapers. This solution makes it possible to realize high-speed, high-quality printing on many low-cost printers on the market. As we did in J1, through the optimization of input shaping and precise pulse control, we increased the maximum printer motion speed from 150mm/s to 350mm/s and the maximum acceleration from 3000mm/s^2 to 10000mm/s^2, while at the same time maintaining the accuracy and stability of motion mechanism.
- Second, Intuitive Touchscreen Interaction. Different from Snapmaker 2.0, we adopted a new communication protocol, rendering the communication between the touchscreen and controller more reliable and user-friendly.
- Third, Innovative IDEX Calibration Method. By utilizing electrical conduction, it enables users to complete the calibration in 10 minutes under the Assist Mode. It reduces errors and arrives at better accuracy.
Among the above improvements, the vibration compensation feature was actually not added to the picture at the very beginning. We took the risk of project delay and decided to implement this feature when the software development for J1 was almost done. Looking back, it did take us lots of hard work and resources to achieve this success. But we also found it immensely rewarding to realize vibration compensation in J1. Thanks to input shaping, J1 is able to achieve better motion performance on the Marlin firmware.
You might be interested in knowing why we added this feature near the end of the product development and how we did it. In the following, we will walk you through the development behind the scenes.
Just like all 3D printing enthusiasts, we have been following the open-source development in 3D printing. As you might know, Klipper incorporated vibration compensation for quite some time, and RRF (RepRapFirmware) also subsequently supported this feature. Because RRF is implemented on an MCU-based platform, we first integrated the input shaping and stepper control logic of RRF into Marlin and attempted to verify it on J1. However, the results were not as good as expected. After a detailed analysis of the code, we found that RRF does not perform input shaping on all movements. What it did was before the input shaping, it pre-determines whether the section of a movement meets the requirements for input shaping. If not, this section of the movement will follow the conventional trapezoidal motion profile to control the motor movement, which will lead to excessive vibration and layer shift when the print head runs in zigzags over short distances.
In terms of Klipper, it does not pre-determine whether a segment of a movement meets the requirements for input shaping. Klipper directly follows the theory of input shaping by convolving all the motions that the gcode inputs, thus achieving the result that movements of different features are shaped. However, there is no way for us to simply copy this processing logic of Klipper when only having one MCU since Klipper calculates the moment of step output by iteration, which requires a high-performance CPU. And, it also needs a large amount of memory to store signals of each step, which can not be achieved on our MCU. We thought the project might fail after some attempts, but there was still time left for us.
Thereafter, our engineers studied the paper on input shaping in-depth and looked for ways to implement it on an MCU platform.
Eventually, we found a feasible solution for MCU. Similar to the motion profile of RRF: through analytic expression, we obtain the piecewise functions S=f(t) for the motion segments with different accelerations, which are functions of displacement with respect to time. These piecewise functions can be used in stepper ISR to obtain the moment when the step signal should be emitted in the corresponding motion segment, and thus we can know the time interval of the stepper ISR interruptions. If the specified axis does not need to be shaped (e.g. Z axis), then it directly splits the original motion into motion segments of different accelerations and obtains its piecewise function queue. If the specified axis needs to be shaped (e.g. X&Y axis), then after splitting their original motion into motion segments of different accelerations, these segments are input to the shaper, which convolves the queue of original motion segments and outputs the piecewise function queue. The following is a simple step-by-step description of the input shaping process. If you want to get down to the details, you can refer to the codes in the GitHub repository. Let’s start with motion segments with different accelerations:
1. First of all, the motion block queue in Marlin is broken down into a move queue, where each move represents a motion segment with the same acceleration, and its function is S=f(t) = S0 + V0t0 + 0.5 * a * t^2. Then the whole move queue is actually a series of S=f(t) functions, except that the domain of each function is finite. And because each move in the queue moves consecutively on the same time axis (the end time of each move is the start time of the next move), the domain of this series of functions is also connected back and forth on the time axis.
2. Next, perform input shaping on the original move queue. The position of the shaper output is calculated by convolving the positions in the original move.
- First, a “shaper window” is created, which is a virtual time window on the time axis of the move queue. The window contains sampling points, each containing two important parameters: weight A and time T. The number of sampling points and weight A are determined by the input shaper configuration parameters. T is the time of the sampling point on the time axis of the move queue. And the time interval between each sampling point is also determined by the input shaper configuration parameters, so the window contains a fixed width of time. In addition, the “shaper window” moves from left to right on the time axis, and the right side is the direction of time growth.
- When the shaper window coincides with the time intervals of one or several moves on the time axis, the T of each sampling point falls within the time interval of a specific move. Then, the position of each sampling point corresponding to T can be calculated from the describing function S=f(t) of the move based on where T is located. The position of the original motion corresponding to T at each sampling point is weighted and summed using A corresponding to the sampling point to obtain the position after input shaping. The displacement function after input shaping can be expressed as: S’ = f'(t) = Σ [ Ai * Si ] = Σ { Ai * [S0 + V0 * Ti + 0.5 * ai * Ti^2] }.
- In this equation, Ai represents the weight of the ith sampling point, Ti represents the T corresponding to the ith sampling point, and ai represents the acceleration of the move corresponding to T.
3. When the window moving on the time axis of the move queue, the T of the sampling point corresponding to the move will keep changing, which causes the displacement function corresponding to the position of the sampling point to change as well, and we will get a series of S’. This series of S’ is the queue of piecewise functions after the convolution described earlier in this article. Now, all we have to do is to recompute the coefficients of each variable in S’ whenever the move corresponding to T changes at any sampling point in the window. We know from the previous step that S’ is actually also a function of displacement with respect to time t. If we have a known S’, we can likewise calculate the corresponding t by S’=f'(t), which is the next step to be done in stepper ISR.
4. Each time entering stepper’s ISR, we first send the step signal planned last time (if it exists). Then we use the piecewise function S'(t) for each axis to obtain the moment sending out the next step, because we only need to add one step to the current position and then insert it into the function to calculate t. Then we pick the minimum t of all the axes and configure the interval between the minimum and the current moment into the stepper’s timer, so that we can send the step signal precisely according to the planned time. We can then send out the step signal precisely at the planned time (due to limited performance, we can’t be absolutely precise on this, but that’s our goal).
The above is a brief introduction to the vibration compensation feature. If you are interested in the details, you can refer to the code in the repository. Basically, it contains two important parts; one is input shaping, which is the key to cancel vibration; the other one is to send the step signal at a precise moment.
It is very important to send the step signal at a precise time. Learning from our previous tests verifying RRF, we already knew that RRF’s step signal control is very different from that of Marlin: RRF strives to send the step signal for each axis exactly at the moment calculated by the piecewise function so that the motion of the toolhead can follow the path described by gcode as perfectly as possible. Klipper is also the same in this respect.
After deciding on the solution, we quickly verified the prototype and tested it thoroughly. The test results were exciting: a J1 with vibration compensation implemented only on the MCU platform was basically comparable with a J1 with Klipper control (Linux host + MCU). Therefore, we were able to add the vibration compensation feature to J1 right before the product launch. It wasn’t an easy task. But we decided to go all out simply because we want to keep making something wonderful!
GitHub Repository of J1 Controller Firmware: https://github.com/Snapmaker/SnapmakerController-IDEX
Learn more about Snapmaker J1.
The post Snapmaker J1 Controller Firmware Open Source Release appeared first on | Blog.
]]>The post Snapmaker Artisan and J1 Make an Impressive Pivot at CES 2023 appeared first on | Blog.
]]>Hi Makers,
We recently attended CES 2023, the world’s most influential technology event, from Jan. 5 to 8 in Las Vegas, NV. More than that, Snapmaker has been named a CES 2023 Innovation Awards Honoree for Snapmaker Artisan!
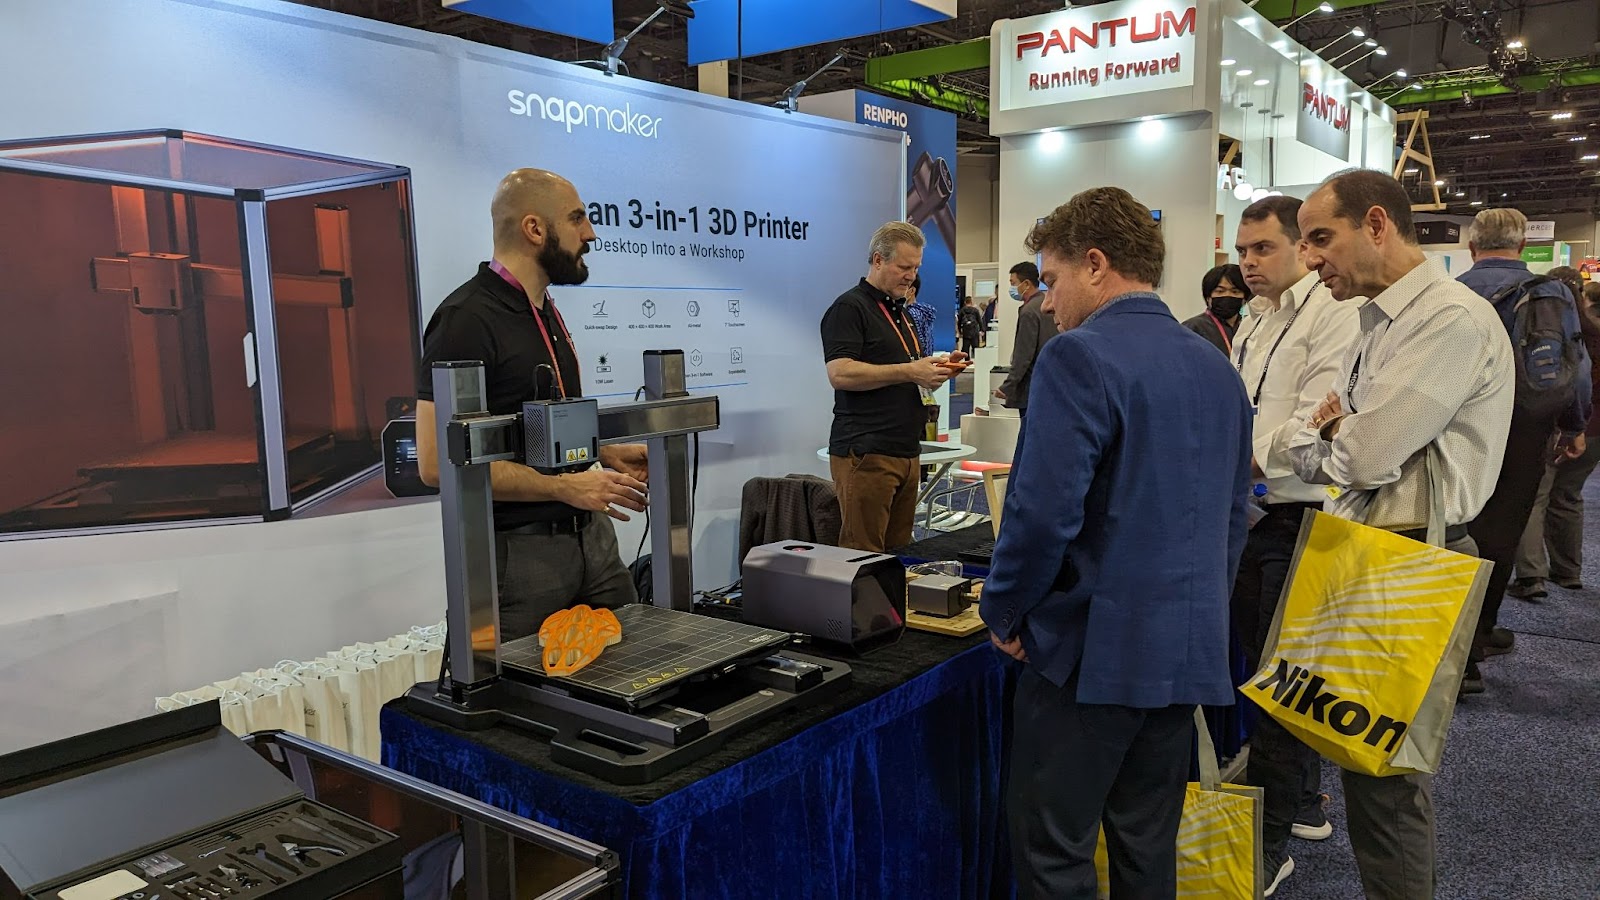
The CES Innovation Awards program, owned and produced by the Consumer Technology Association (CTA)®, is an annual competition honoring outstanding design and engineering in 28 consumer technology product categories. This year, among over 2100 submissions, Snapmaker Artisan stands out in differentiation with the idea of upgraded modular design, and its high quality and performance. Snapmaker Artisan is the latest generation of Snapmaker’s 3-in-1 3D printer, which is equipped with 300°C dual extrusion 3D printing module, 10W high power laser module, 200W CNC cutting module, 400 x 400 x 400 giant work area and an innovative quick-swap design. The upgraded functions allow Artisan to push the limits of what a modular fabrication tool can do.

Additionally, we brought J1 to the show as well. The Snapmaker J1 High Speed IDEX 3D Printer boasts two extruders with an ultra-fast printing speed of up to 350 mm/s. Due to its elaborate hardware design and outstanding printing performance, it successfully attracted the attention of thousands of on-site visitors.
New products aside, it’s notable that well-loved 3D printing content creator Joel Telling (3D Printing Nerd) joined the show and came to the Snapmaker booth to share and discuss his thoughts on Artisan and J1.

“We’re proud to be honored once again with the CES Innovation Award”, said Joshua Little, Key Account Manager at Snapmaker. “Snapmaker is always committed to creating premium-quality and user-friendly desktop fabrication machines. Both Artisan and J1 are products integrating high-class hardware, user-friendly workflow, and high-standard print quality requirements to ensure user experience. It is a pleasure to communicate in person with our users, partners, and Snapmaker enthusiasts and receive positive feedback from them! Hope to see you all next year!”
The post Snapmaker Artisan and J1 Make an Impressive Pivot at CES 2023 appeared first on | Blog.
]]>The post Snapmaker Brought New Products Artisan and J1 to TCT Asia appeared first on | Blog.
]]>More than 3D Printing: Snapmaker 2.0 3-in-1 3D Printer

Thanks to the modular concept, Snapmaker 2.0 integrates three powerful functions of 3D printing, laser engraving and cutting, and CNC carving, truly demonstrating the unique charm of three in one. Users can use three different functions on the same machine with almost the same operation logic. In addition, it can also be used with the Enclosure, Air Purifier, 10W High Power Laser Module, Rotary Module, Emergency Stop Button, and Can Hub to expand the application scenarios and greatly enhance the fun and imagination of creation!

The 2.0 Rotary Module featured in this exhibition is an add-on of the Snapmaker 2.0 modular ecosystem. This module adds another axis to Snapmaker 2.0, allowing users to unlock new possibilities in 4-axis CNC and laser engraving!


New Members of the Desktop Digital Fabrication Product Mix: Artisan & J1
The exhibition is also the global debut of two new products – the Snapmaker Artisan 3-in-1 3D Printer and the Snapmaker J1 High Speed IDEX 3D Printer. Some users of Snapmaker also came to the scene to experience new features of the two new products.

Snapmaker Artisan is the latest generation of 3-in-1 3D printers. It’s larger, stronger and easier to use. The 300°C Dual Extrusion 3D Printing Module supports printing of more advanced materials, such as soluble/easy-to-remove support printing, TPU, nylon, etc. The 10W High Power Laser Module and 200W CNC Module will bring users a more efficient desktop-level making experience.

In addition to Artisan, Snapmaker’s first High Speed IDEX 3D printer J1 also came to the scene and demonstrated 350 mm/s IDEX 3D printing, achieving printing 2 3DBenchy boats in 22 minutes with different colors.

There are also use cases printed with different materials next to J1. The visitors can experience the characteristics of different materials by touching the use cases themselves, and fully understand the possibility of multi-material printing. Many visitors were amazed by use cases that are printed in two colors, for example, the cartoon car and Chinese chess.

The two new products will be exhibited in Formnext next week as well. Join us if you are around from Nov 15 to 18. Join our Facebook group if you want a free ticket (number limited). See you next week!
The post Snapmaker Brought New Products Artisan and J1 to TCT Asia appeared first on | Blog.
]]>The post How does Snapmaker J1 achieve both high-efficiency and high-quality IDEX 3D printing? appeared first on | Blog.
]]>Hi Makers,
As we all know, 3D printing is still fundamentally slow. This attribute manifests itself more evidently in FDM technology. Depending on the complexity and dimension of models, and the user’s need for accuracy, some kinds of prints take hours or even days to finish. The underlying logic is a trade-off between quality and time.
Snapmaker J1 is a brand-new product that successfully secures quality and speed simultaneously for its users. Compared to major IDEX 3D printers in the market, one of the shining features of J1 is high-speed printing. It is usually not easy for an IDEX 3D printer to speed up. On the one hand, two independent extruders mean more weight, which increases the inertia. On the other hand, the X-axis has to carry more weight while moving two print heads. Under this circumstance, achieving accurate movements is more challenging. Given this structural challenge, we still effectively improved the printing speed performance of J1, retaining the 0.1 mm layer height at the speed of 350 mm/s.
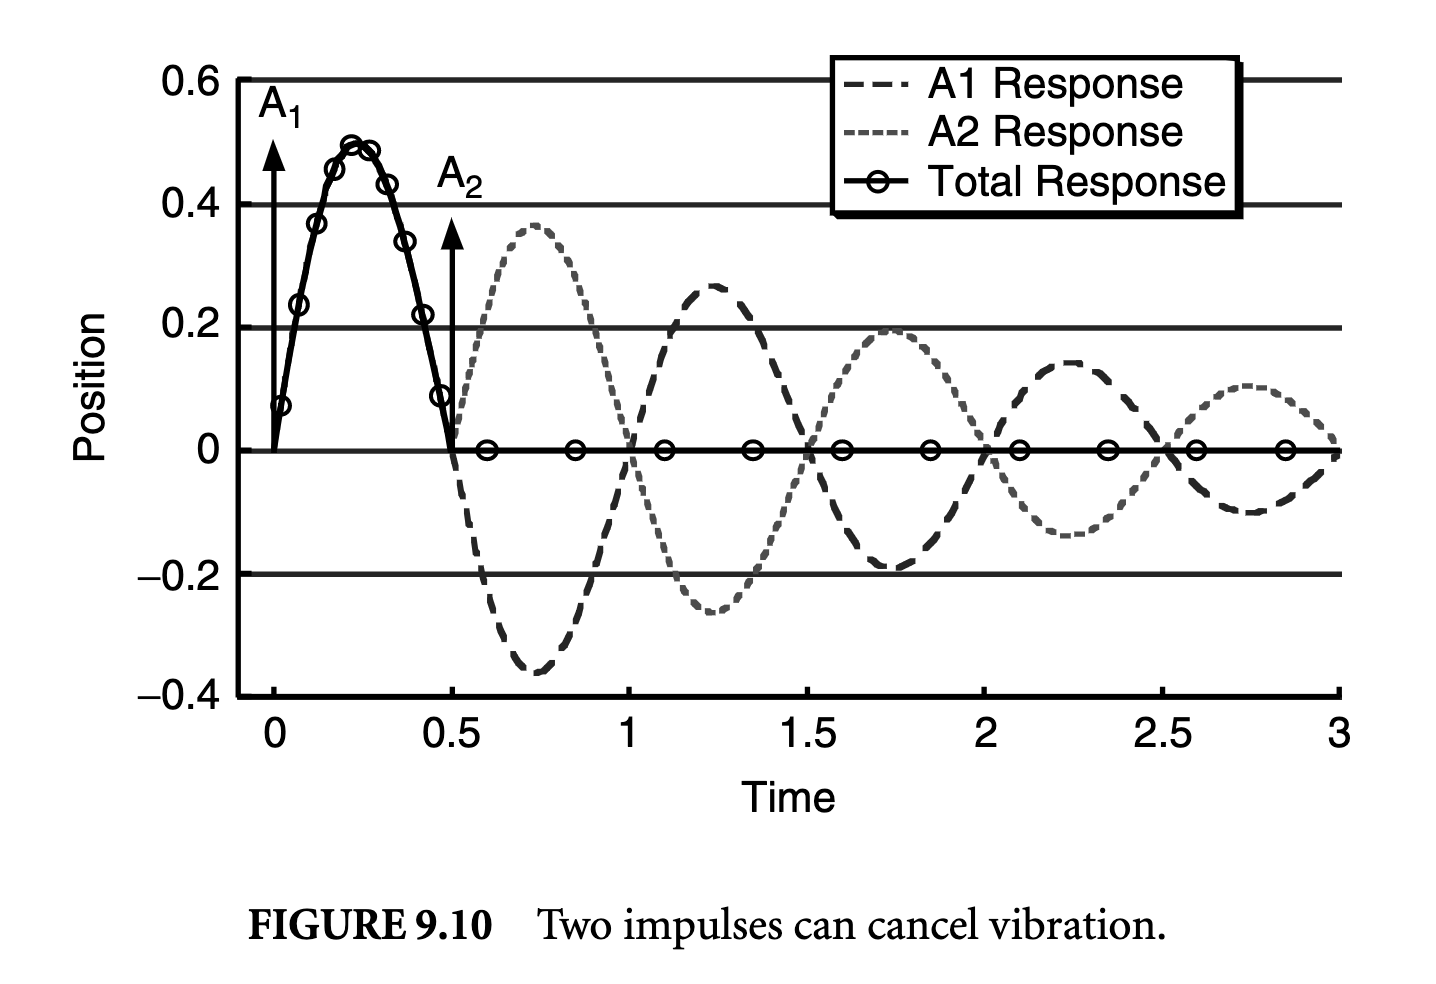
It’s made possible by four firmware- and software-based solutions. The first is vibration compensation, also known as Input Shaping. High-speed movement is prone to excessive or residual vibration, particularly at the end of a movement, leaving unwanted ringing or ghosting effects on prints, thus compromising quality. Input shaping is a preemptive approach to counter vibration. Based on specific resonant frequencies, the input shaping technique yields the command signal sent out several waves one after another. The amplitude of multiple waves will be ultimately superimposed on each other, and thus, the vibration can be perfectly canceled out.
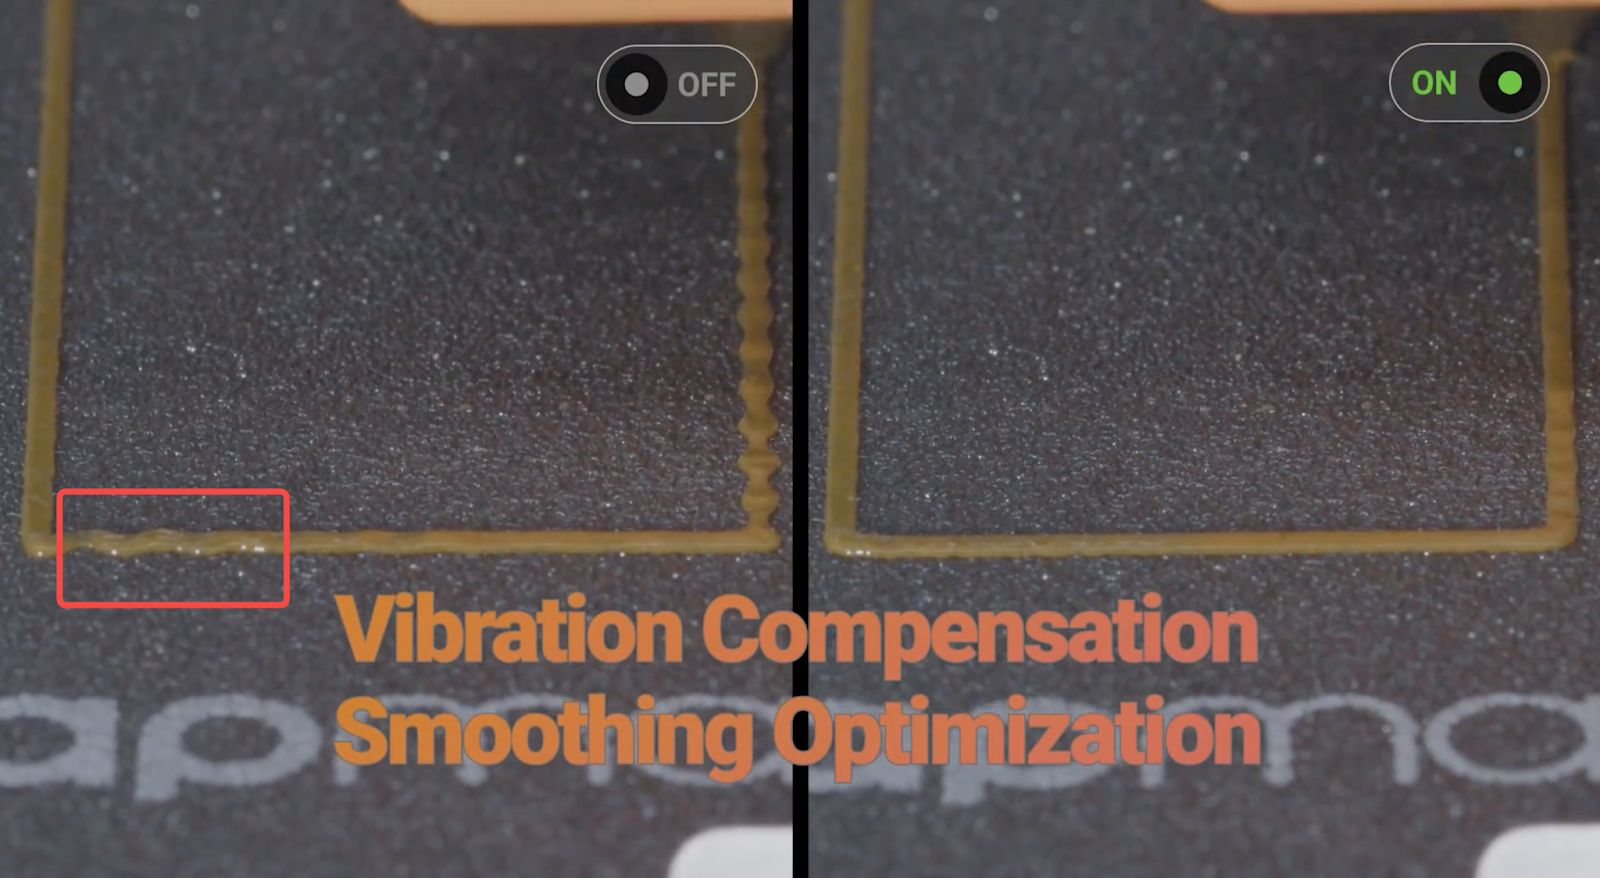
Below is a screenshot documenting the degree of vibration when input shaping is on and off in J1. As you can see, the uneven part of the line shows free vibration, which occurs when the print head once changes the direction of its movement.
3D-printing sharp corners at a fast speed will easily disrupt print quality. Therefore, second, we optimize cornering speed by analyzing moving directions ahead of time, which can improve print quality at corners.
Third, the print head running in zigzags over short distances often accelerates and brakes in alternation. And this process could be pretty jerky and noisy when the entire machine shakes with it. Thus, we also adjust the maximum possible print speed when the print head zigzagging at high frequencies.
The above improvements were inspired by the open-source firmware Klipper. The great news is that in addition to J1, vibration compensation will also be realized in Snapmaker Artisan and Snapmaker 2.0. Please stay tuned for future firmware updates.
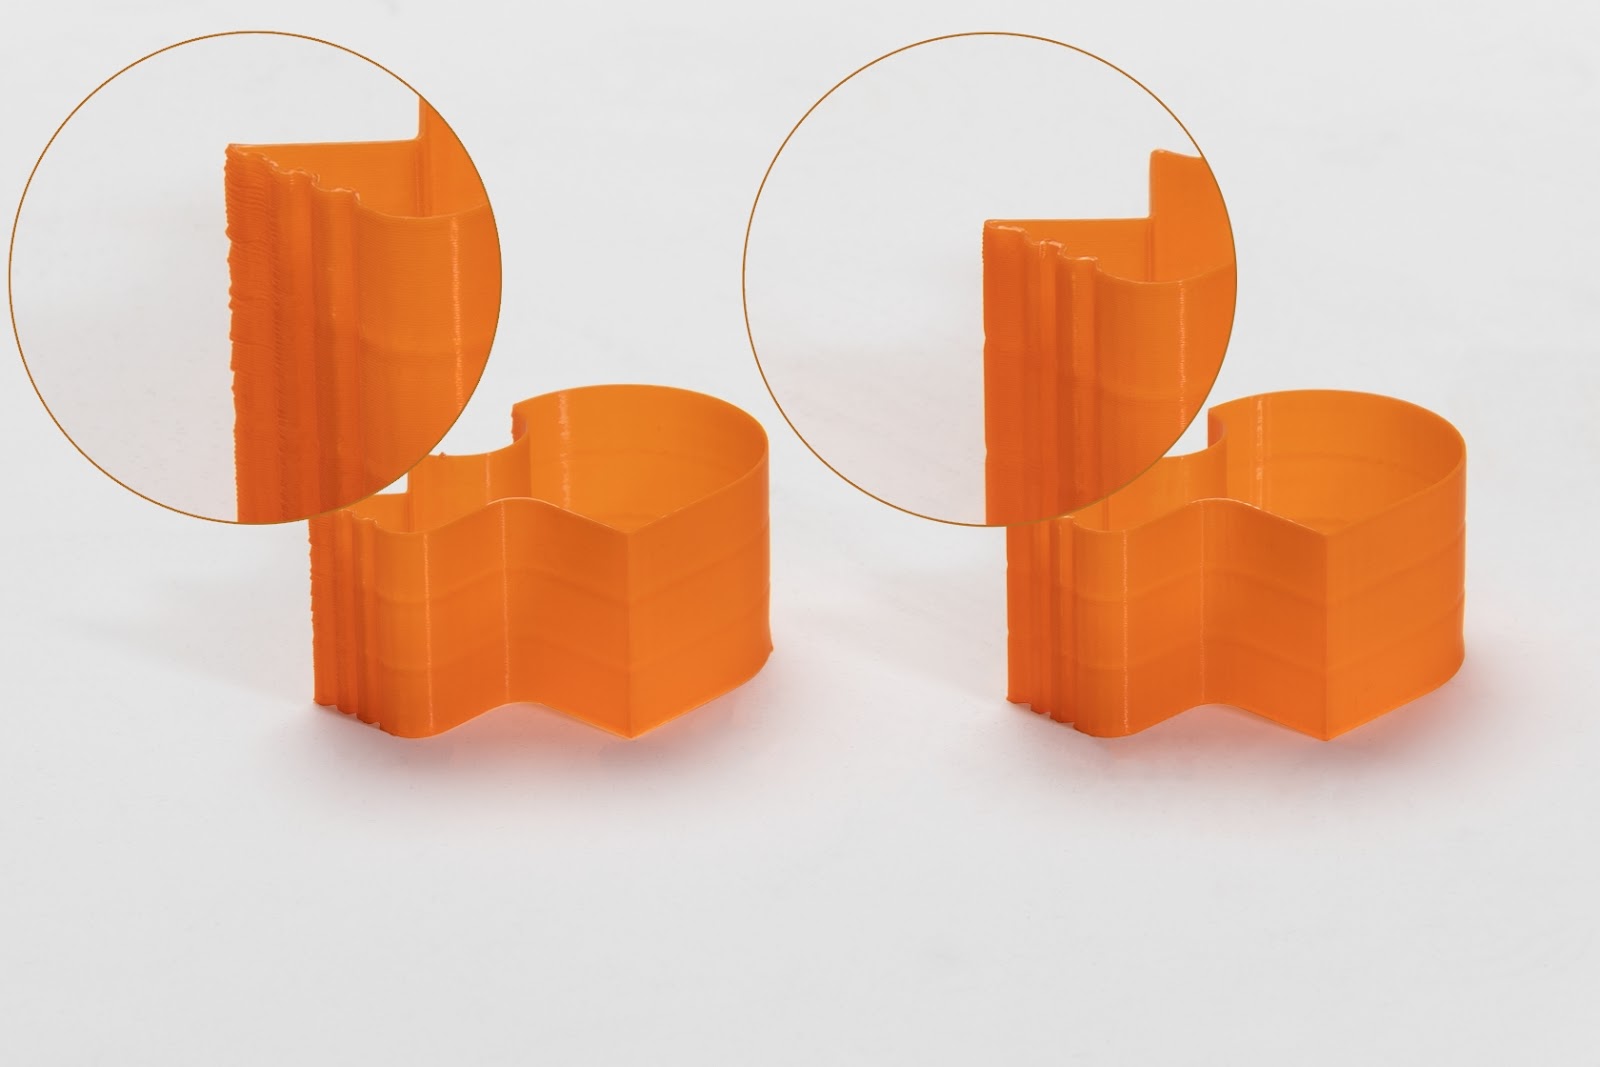
Fourth, we introduce a nonstop switching mechanism into IDEX printing, bringing the advantages of IDEX into full play. This mechanism applies to the scenario where the two print heads work alternatively, as in bicolor printing. Usually, only when one extruder finishes printing and then parks aside will the other extruder start heating up from the standby temperature to the initial printing temperature and then be switched back and resume printing.
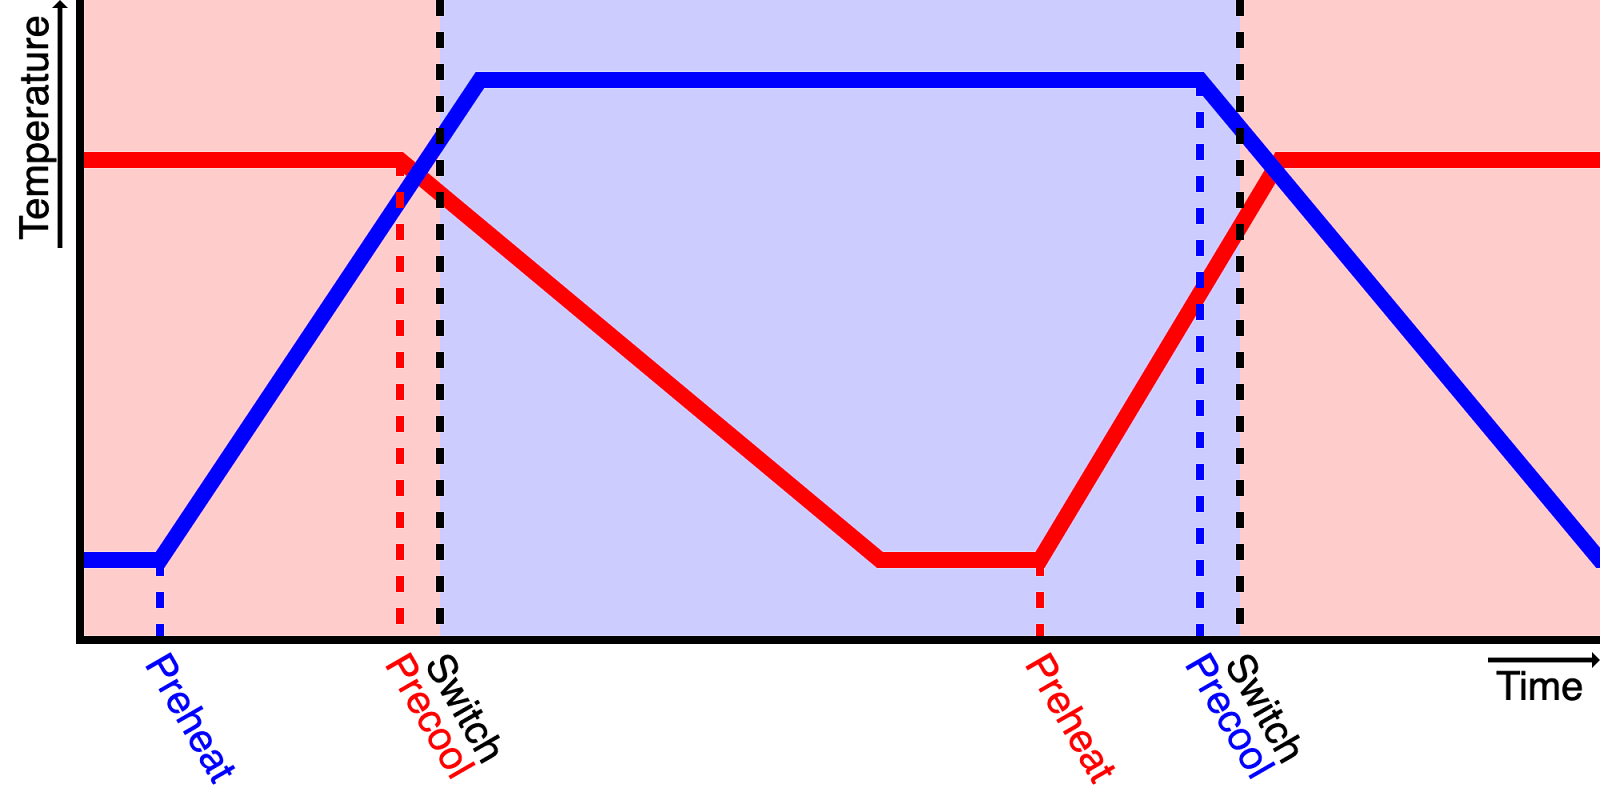
Now, with our improvements in software and firmware, the non-operating extruder will preheat to the initial printing temperature while waiting and head to the goal position right after the operating extruder leaves for the resting position. In this way, the two extruders switch to each other seamlessly, providing a nonstop experience for J1’s users. Watch the video below and see how it works!
Apart from software- and firmware-based improvements, the hardware components of J1 also lay a solid foundation for faster print speed and better print results. J1’s body comprises an upper frame, a base made by one-piece die casting, and four aluminum alloy bars. J1 is so rigid and reliable with minimal wobble and deformation possible. The industrial-grade linear rails are made by CNC grinding at the micron level, ensuring smooth and steady movements.
We briefly explained how J1 achieves both high-efficiency and high-quality IDEX printing in this blog. What do you think? Leave your thoughts below!
The post How does Snapmaker J1 achieve both high-efficiency and high-quality IDEX 3D printing? appeared first on | Blog.
]]>The post Try Out Snapmaker J1 3D Printer Before Anyone Else appeared first on | Blog.
]]>Hi Makers,
We are recruiting makers worldwide to review Snapmaker J1. As long as you are interested in J1, you can join and win a chance to review J1 in 14 days for free!
Application requirements
1. It is required to publish a product review (photos or videos that can showcase the participant’s experience with J1) on at least one of their social media accounts after using the product.
2.Every Product Experience Officer enjoys a 14-day period to test and review (from the day the participant receives J1 to the day this participant sends the machine to the next participant).
Enter here
FAQ
How are the Product Experience Officers picked?
The participants are randomly picked with a third-party app. We will review the entries to ensure that all final participants have provided information as required. Otherwise, we will re-pick.
How do I know if I am picked?
After the application is approved, representatives from Snapmaker team will contact the applicant by email. If the applicant fails to provide a valid delivery address within 5 working days, this application will be regarded as a waiver.
Whom should I ask if I have questions about this event?
Feel free to contact us via social@snapmaker.com if you have any questions.
Terms and conditions
1. During the product experience and product delivery period, if the product is lost or damaged due to improper use/storage/packing by the participant, the participant shall pay compensation to Snapmaker. The compensation amount is the pre-order price of J1, which is $1099 or €1339.
2. Participants must authorize Snapmaker to edit, publish, and disseminate all the text, images, videos, and other content submitted by the participants during the event through various publicity channels.
3. The right to interpret this event belongs to Snapmaker. If the participants violate the rules of the event, we have the right to cancel their participation qualifications and require participants to return the machine immediately.
4. After the product experience period ends, if the participants occupy the product without reason or refuse to return it, Snapmaker has the right to take further legal action.
The post Try Out Snapmaker J1 3D Printer Before Anyone Else appeared first on | Blog.
]]>The post Introducing Snapmaker J1 3D Printer: IDEX Made Faster appeared first on | Blog.
]]>Hi makers,
In the previous article, we announced the return of Snapmaker’s early founding team members with their J1 IDEX 3D printer. Today, we will further unveil many more exciting features of J1, which bring infinite possibilities and make 3D printing a simple joy!

Up to 350 mm/s printing speed and up to 10000 mm/s² acceleration
J1 brings you prints of high resolution while increasing the printing speed to 350 mm/s. It is made possible by the optimization of the vibration compensation technology. This technology reduces the vibrations caused by high-speed movements, minimizing ringing to enhance print quality. With the maximum acceleration of 10000 mm/s², you can realize small models packed with details with efficiency. Overall, the usual printing time is reduced by ⅔ while impeccable details are still within reach. [1]
IDEXcel in dual-material printing
Compared with a multi-material unit on a single extruder, IDEX dual-material printing requires less time in filament changing and creates less waste. Plus, IDEX offers the cleanest two-extruder solution that prevents cross-contamination. It creates a clean interface between two materials, embracing hassle-free removal and avoiding stains and weird blending along the seam.
Breakaway supports & dissolvable supports for effortless removal and accurate details
Building and removing support can look like rocket science sometimes, but we’ve done the math for you–steady support, clean interface, effortless removal, and minimal post-processing needed to maintain high dimensional accuracy.

Breakaway filament offers the same support as normal materials but is much easier to remove without the need for further post-processing. J1 supports PVA and other dissolvable materials. Soak the print, and the supports dissolve, leading to a smooth surface and excellent dimensional accuracy. If you are looking for complex geometry, hollow structures, and exquisite details, this is for you.
Choose different settings for two extruders to maximize the performance of individual filaments. For example, you can combine the strength of nylon with the flexibility of TPU for functional parts that can stand daily wear and tear impressively. Or, you can produce bicolor prints and add a splash of personality to your concept models, miniatures, party essentials, gift items, and home decor. Even more, you can have different materials on the walls and the infill. By printing infill with economical materials plus a large-diameter nozzle, you can now spend most of your time and money budget on working the exterior to perfection.
Copy Mode & Mirror Mode double your productivity
IDEX is the only extrusion system with two separate extruders moving independently on the X-axis, enabling you to run two prints simultaneously. With Copy Mode and Mirror Mode, you can halve your wait time and double your productivity. Copy Mode is especially suitable for batch printing, empowering studios and enthusiasts. If one of the prints runs into an issue, you can stop that print without affecting the other. This mode is a lifesaver for a promised delivery on a tight schedule. Under Mirror Mode, J1 directly mirrors your model and prints the original and the mirrored one in one go. For a symmetrical model, you can import half of it and print it in Mirror Mode to cut your wait time by 50%, perfect for quick drafts and concept models. Like in the Copy Mode, you can stop one print without affecting the other.

Ultimate rigidity from the one-piece casted parts, high-precision linear rails, aluminum alloy frame
J1’s body comprises an upper frame and a base made by one-piece die casting, and four aluminum alloy bars. Making the body with just a few highly integrated parts—an approach long adopted by the automotive industry—facilitates precision assembly. J1 is so rigid and reliable with minimal wobble and deformation possible that you can do a large-print marathon and get all the prints with uncompromising quality.
The industrial-grade linear rails are made by CNC grinding at the micron level, ensuring smooth and steady movements. A significant rise in precision, rigidity, and durability for you to savor a fast, accurate, and steady-making experience. The repeatability measures ± 0.03 mm (X/Y) and ± 0.02 mm (Z). [2] Expected Lifespan is over 10 Years.[3]
J1 inherits Snapmaker’s iconic all-metal design which is highly valued by users for its rigidity and durability. It provides better heat dissipation with the main board and power supply spread out on the base and aluminum alloy as its main material.
Print with advanced materials like PA, PC, and TPU, and deliver fabulous results
Extruders are redesigned to deliver a superb performance consistently with demanding, advanced materials, including nylon, reinforced nylon, PC, TPU and PA-CF. First, 300°C All-metal Hot Ends enable you to print with high-temperature filaments, like nylon, reinforced nylon, PC and PA-CF. With silicone hot end socks preventing heat loss, filaments melting and heating up are much faster. Anti-clogging designs make the flow as smooth as possible.
Second, dual direct drives have excellent extrusion accuracy and are highly responsive, making deposition faster, smoother, and more accurately controlled. It is built in with a filament sensor to inform you and pause the print job in the case of filament runout, nozzle clogging, and other abnormalities that fail filament loading.
Third, the compact extrusion path of a unique design allows you to print seamlessly with TPU and many other flexible materials.
Fourth, the enclosed space provides stable ambient conditions to facilitate the consistently reliable performance of high-temperature materials. For instance, it keeps ABS and many other materials from warping.
4-minute intelligent calibration with no calibration card
We utilize electrical conduction to locate the two hot ends and the heated bed and measure the distances between the three entities—a creative solution to complex IDEX calibration. This time saver enables you to complete the calibration in 4 minutes under the Assist Mode. It reduces errors and arrives at better accuracy.
When the two hot ends touch the square opening on the heated bed, it sends out electronic signals to suggest their exact locations, and J1 calculates the offsets between them. J1 then auto-compensates the offsets during printing to ensure perfect XY alignment that avoids layer shifting and improves the success rate of dual-material prints.
A level print bed lays the foundation for successful 3D prints, but the bed leveling of IDEX printers can be very time-consuming. Using a PEI glass plate of high flatness, J1 can downsize from a 3 × 3 (9 points) or 4 × 4 (16 points) leveling to a 3-point one with no compromise on levelness and downtime dropped by 70–80%.[4] Turn the leveling wheel as guided on the touchscreen, and the bed is leveled for tip-top first-layer adhesion.
Using electrical conduction, J1 can calculate the distances between the hot ends and the heated bed. Thus, we were able to cut the step of moving the calibration card back and forth while adjusting the Z offset. Simply turn the thumb wheel as guided on the touchscreen and you are now the Z offset calibration guru!
In this article, we have shared lots of great things about this brand-new 3D printer of Snapmaker. We hope you have enjoyed it! We made every decision in the product development for one purpose–print better, better prints. Advancements in extruders, materials, structural designs, linear rails, and many other aspects are made for you to work to the fullest for every project.
From Oct 27 to Nov 17, we will recruit makers worldwide to review Snapmaker J1. You can enter to win the chance to try out and review J1 for free! Stay tuned.
[1] The data is estimated based on where regular IDEX 3D printers print at 50 mm/s to 80 mm/s and J1 prints at 350 mm/s for the same model. It may vary depending on the testing conditions and product iteration, and is for reference only.
[2] The data may vary depending on the testing conditions and product iteration, and is for reference only.
[3] The data is estimated based on the usage of printing at 100 mm/s for 24 hours per day. It may vary depending on the testing conditions and product iteration, and is for reference only.
[4] The data may vary depending on the testing conditions and product iteration, and is for reference only.
The post Introducing Snapmaker J1 3D Printer: IDEX Made Faster appeared first on | Blog.
]]>